I may receive a commission if you purchase through links in this post. I am not a doctor; please consult your practitioner before changing your supplement or healthcare regimen. As an Amazon Associate I earn from qualifying purchases.
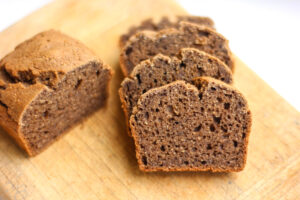
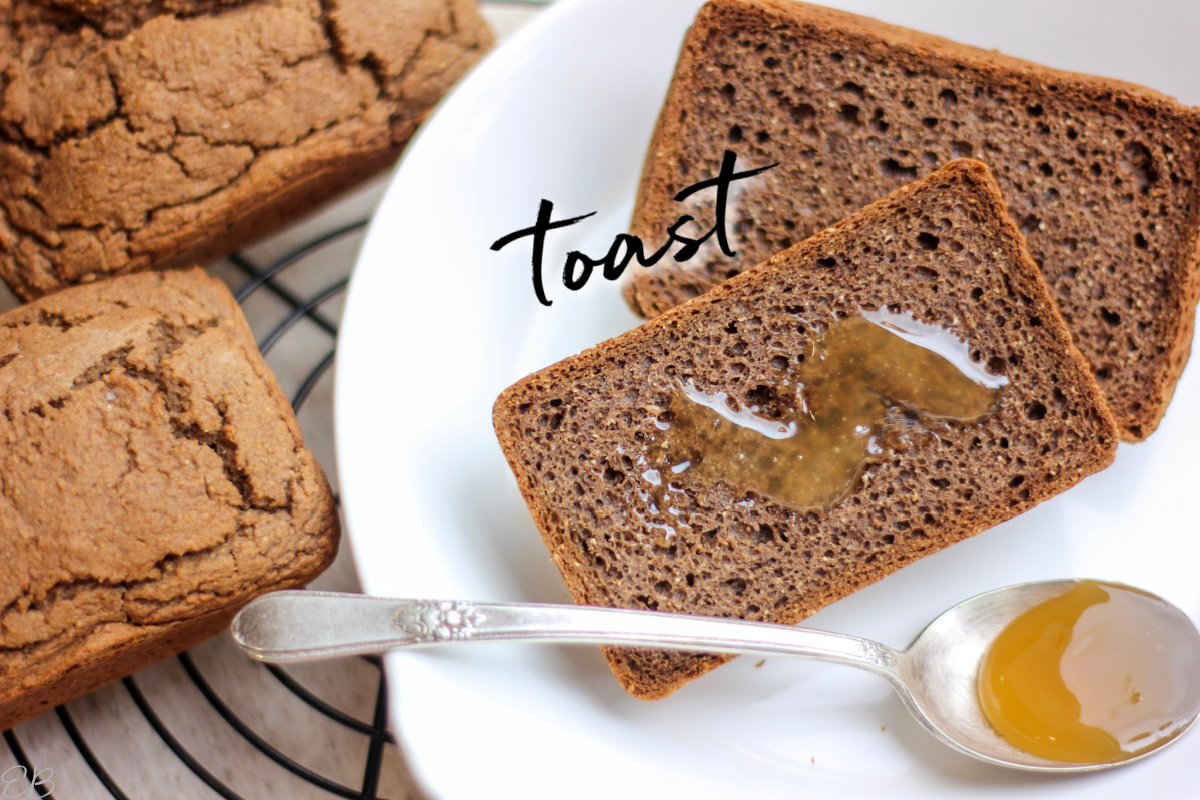
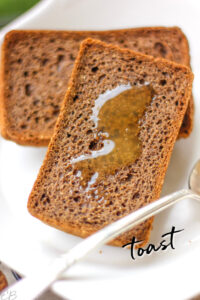
This Best Easy AIP Bread Recipe is a wonderful, quick-to-make bread recipe to use for sandwiches, toast or a side dish! You’ll love the mini loaves and having an easy grain-free, egg-free bread recipe!
This recipe also has an easy AIP 90-Second Bread recipe version that you can bake in your microwave or oven!
Food sensitivities-wise, Easy AIP Bread is cassava-free, can be made coconut-free and is always nut and seed-free. Also no arrowroot, tapioca or sweet potato.
Plus, no mashing or blending of ingredients, no extra step! This recipe is made from all pantry staples!
Key benefits of Best Easy AIP Bread Recipe
- Only 2 flours are needed, so more of you can eat it. (Up to 3 flours are used for the very best version of the recipe, but both versions are great.)
- It’s a quick bread recipe: so a simple stirring together of dry ingredients, wet ingredients, and then combine the two. Then bake! Easy.
- No special or unusual ingredients.
- It’s predictable. This recipe works. Not difficult.
- Fast to make.
- Small loaves mean quick baking.
- 90-second option means you can even bake this bread in your microwave.
- Single servings option (small loaves) means portions are ready made for storage, daily meals, travel etc.
- Very versatile: Can be made into rolls or dinner rolls for all your holiday, side dish or sandwich needs.
- Only pantry ingredients are used, so no trip to the market to try and find certain produce items.
- The dough is very nice to work with.
Ingredients in Best Easy AIP Bread Recipe
I wanted to create a recipe for you that’s free of a lot of the most commonly used AIP ingredients, for those of you who have food sensitivities.
I personally love some of the flours I avoid in this recipe, but the point is: have a variety of recipes with different ingredients so ALL of you have a bread you can eat.
And, one that’s fast to make!
So, Best Easy AIP Bread Recipe is cassava-free, can be coconut-free; also: no arrowroot, tapioca or sweet potato. Plus, no veggies or fruits that need to be purchased at a certain ripeness and/or mashed or puréed.
What flour is used
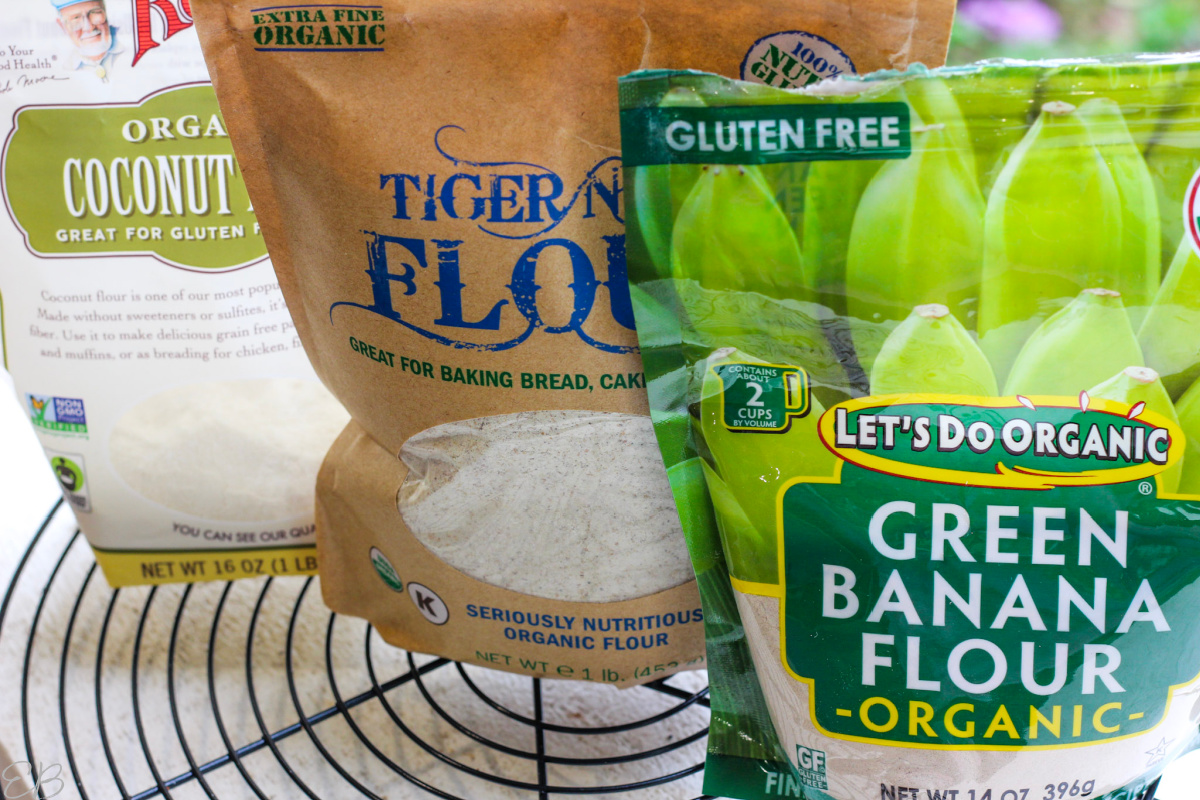
So what flour does this recipe use? Best Easy AIP Bread Recipe uses green banana flour (find it here).
I feel like this ingredient isn’t used enough, and most of you can tolerate bananas.
In this other recipe I use plantains, but that’s more work.
Because Best Easy AIP Bread is meant to be quick, we use a similar ingredient, but it’s flour — so, it’s convenient.
Additional ingredients are:
- tiger nut flour + coconut flour — OR, for coconut-free, you may omit the coconut flour, and see the recipe; you’ll use more tiger nut in its place (I use this one.)
- non-dairy milk — Based on what agrees with your body, choose either coconut milk OR tiger nut milk. (Be sure this ingredient is warm-room temperature or warm, not cold.)
- water + gelatin — Together, these create your “egg”.
- oil of choice — I’ve used avocado oil and MCT oil with this recipe. Likely olive oil is also fine.
- lemon juice or apple cider vinegar — These acids react with baking soda to help the bread rise.
- baking soda + sea salt — For leavening and flavor.
If you want to use only pantry staples, the best ingredient choices are: canned coconut milk and apple cider vinegar.
How to make AIP Bread
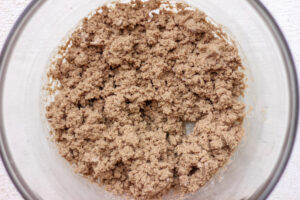
Firstly, I’d like to say that this dough is a dream to work with: the batter mixes together nicely, and then when you go to transfer, scoop it all together. You’ll find you have a nice soft dough that isn’t sticky.
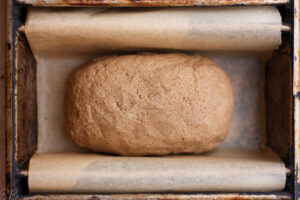
It is very easy to shape however you’d like. So it’s versatile for making various shaped loaves and rolls. Lastly, it releases from your baking dish beautifully after cooking.
To assemble the recipe:
- Combine water and gelatin, and set aside.
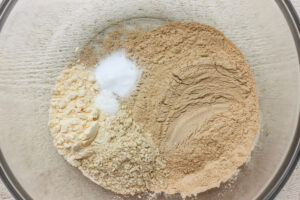
- Mix dry ingredients in one large mixing bowl.
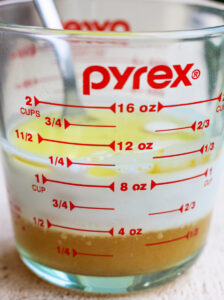
- Add remaining wet ingredients to gelatin bowl, and stir together. (Be sure the milk is room temperature or warm-room temperature, not cold.)
- Scrape wet ingredients into dry ingredients. Use an electric mixer to combine well, without over-mixing.
- Scoop/scrape batter together with a spatula or your hands into a dough-mound.
- Bake in 4 separate prepared pans/dishes, or as one loaf.
In the recipe below, you’ll see exact instructions — including baking times and the 90-second bread option, with microwave instructions.
How big is a Best Easy AIP Bread Recipe loaf
I’ve tried this bread baked four different ways so far, all successfully:
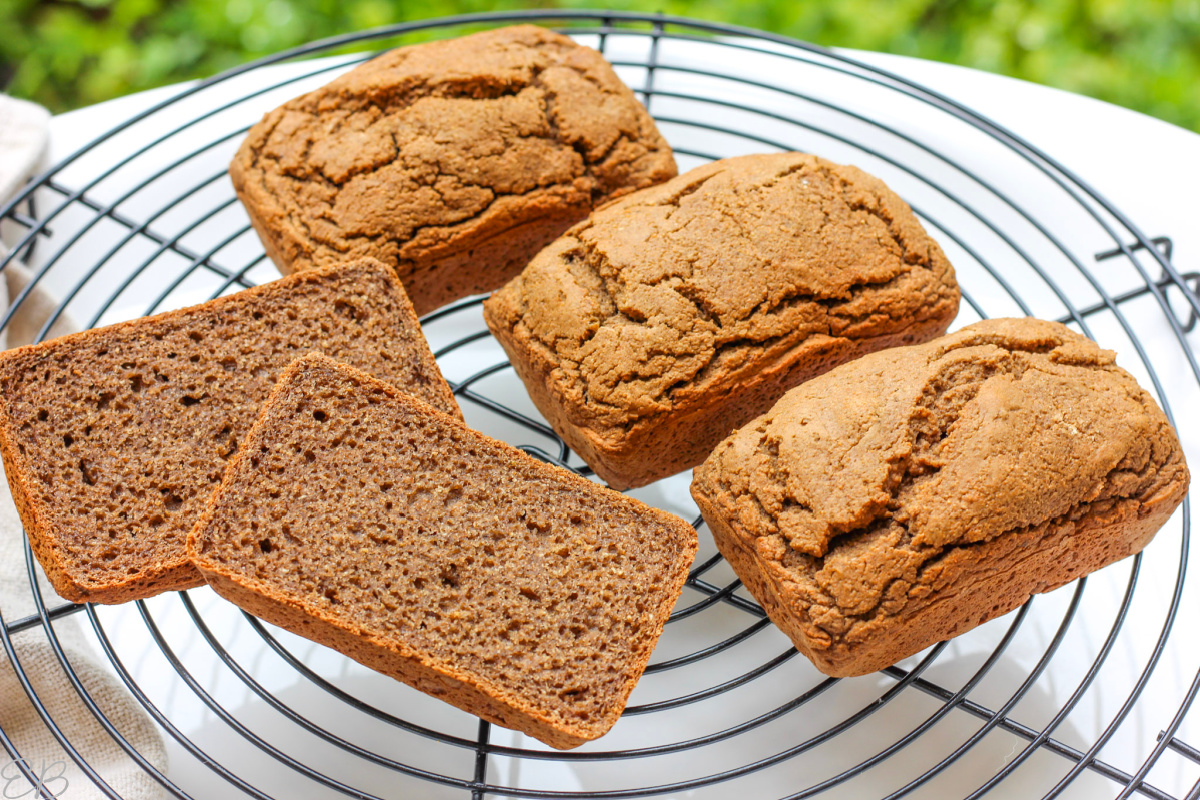
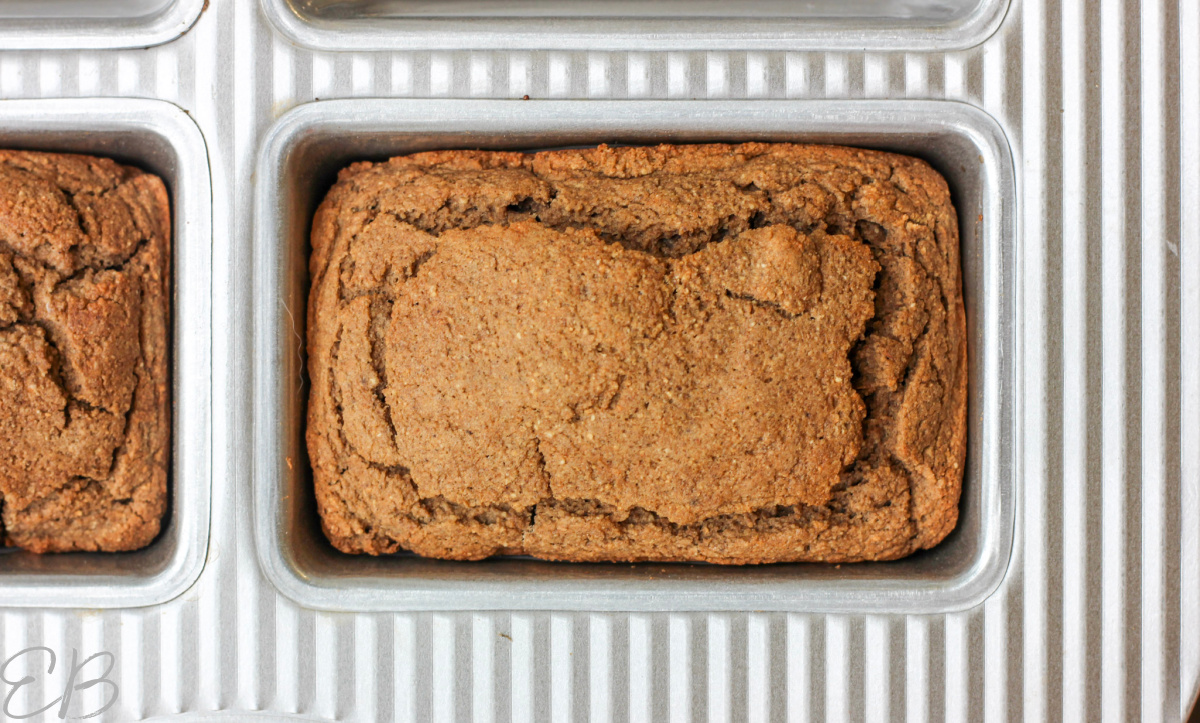
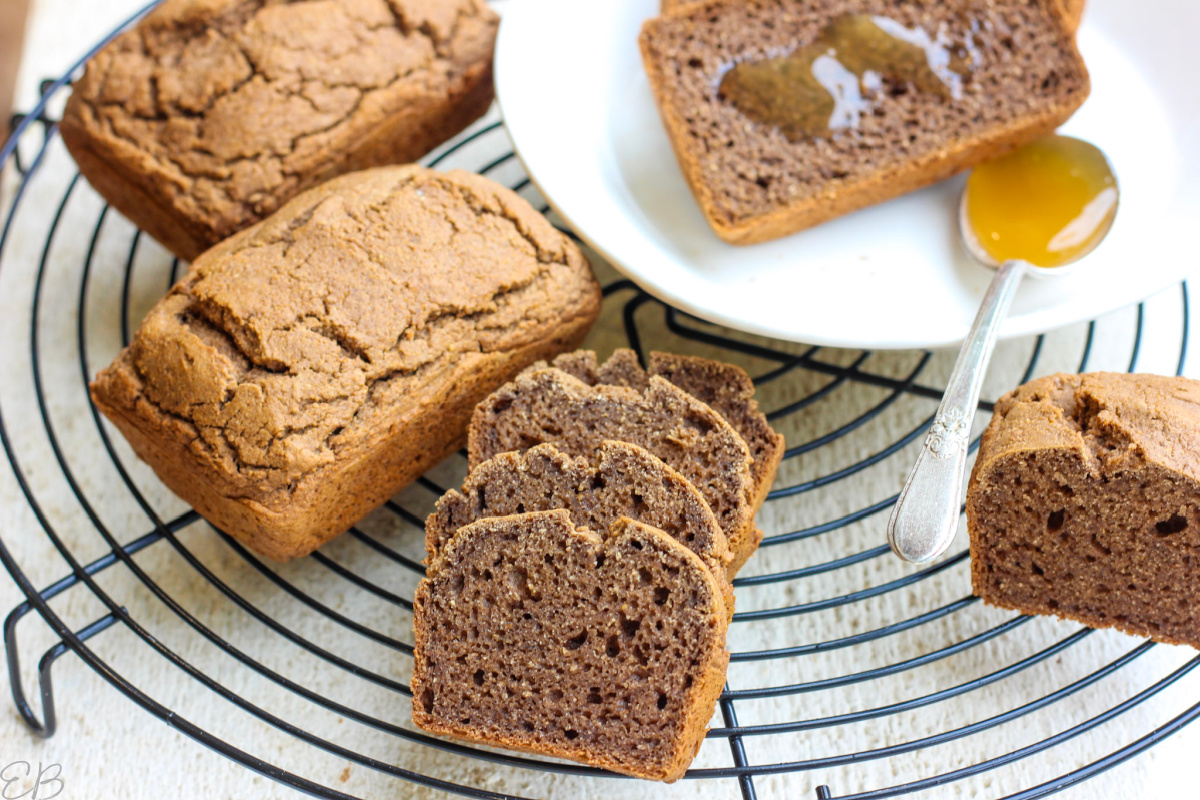
- 4 small loaves, inspired by the 90-second bread recipe concept. These I baked, as you can tell in some of the photos,
 in my favorite mini-loaf pan (I LOVE this pan).
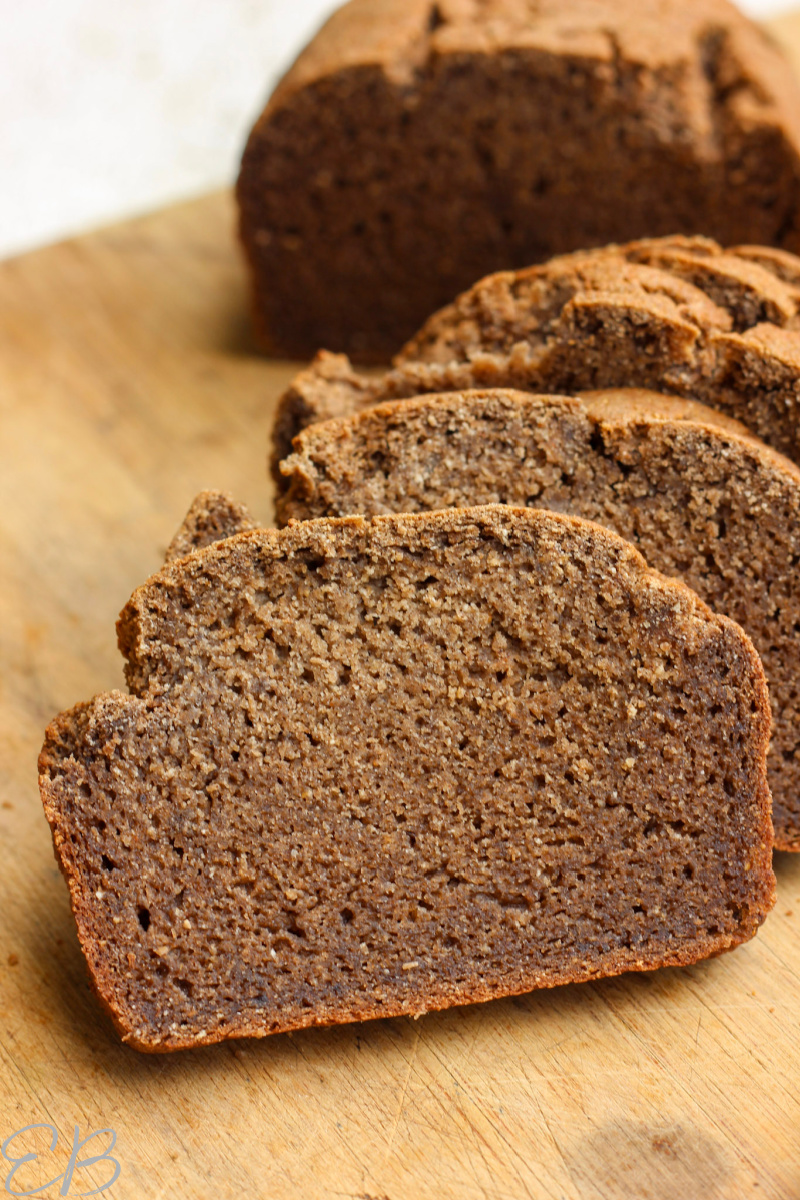
- Cut each one in half height-wise to have two thick slices of bread. Slice in thirds for thinner slices. Or, slice the other direction, as you would sandwich bread, to have adorable smaller sandwich bread-shaped slices.
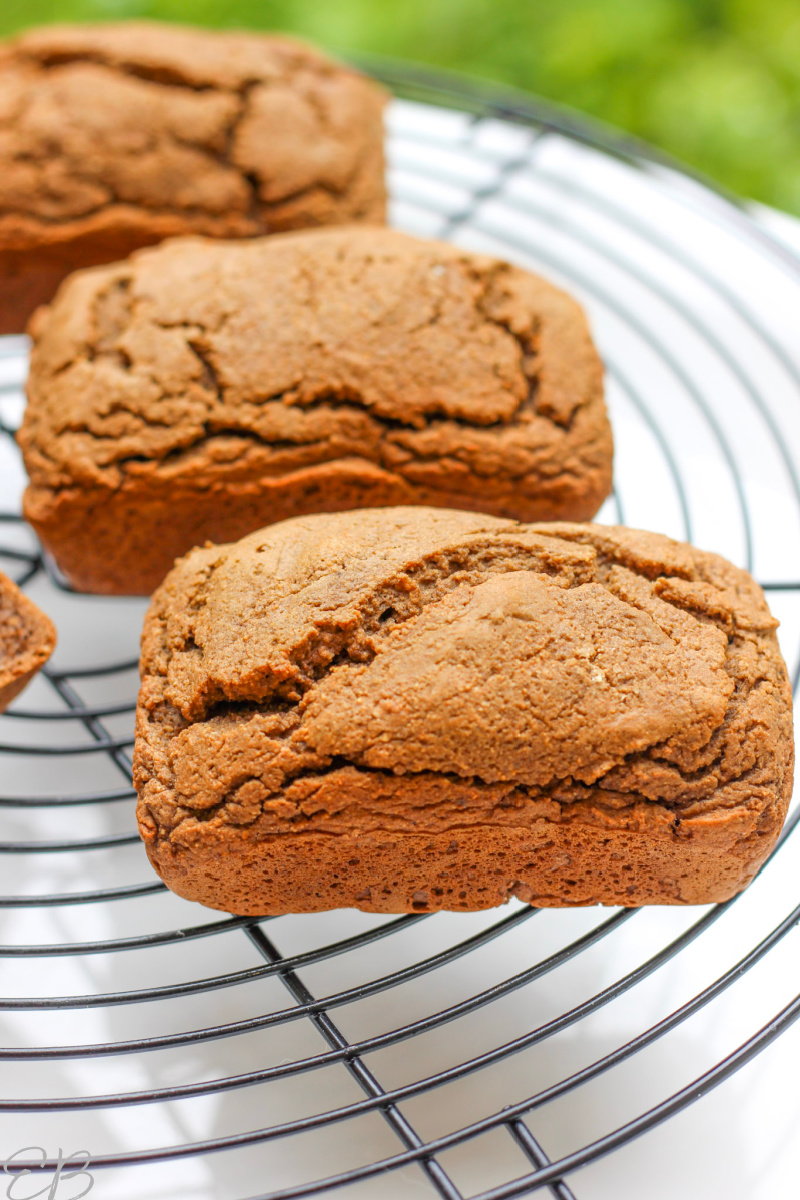
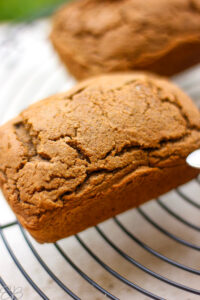
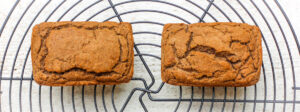
- Personally, the smaller rectangular loaves are my favorite way to make this recipe: perfectly formed, perfectly cooked loaves! Highly recommended. If it’s in your budget, you’ll love this pan.
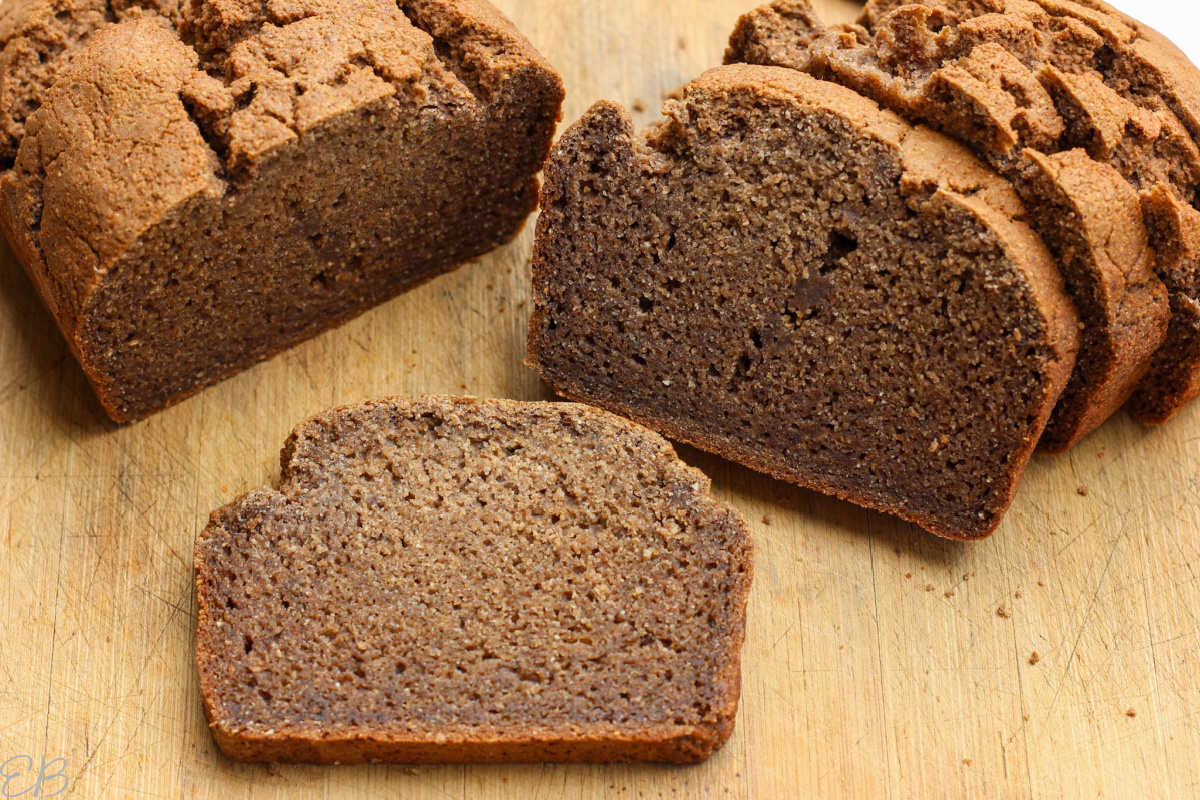
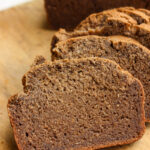
- Smaller loaves allow you to slice this bread as thinly as you like — very well-behaved loaves of bread. Just be sure to fully cool the loaves if you want to slice them thinly.
- A small loaf measuring 3 inches tall, 5 inches long and 4 inches wide. This size is a half loaf. It is exactly the size of half a loaf of regular bread. It’s cute, but still substantial.
- As the photos show, it works well as a free-form loaf of bread, so you don’t need a loaf pan. Feel free to bake it on a pan, on a piece of parchment paper. Just shape the loaf you’d like to have. This means you could also create a longer, more baguette looking loaf.
- Or, as I’ve done, place the formed loaf shape into a small loaf pan, so when it expands during baking, the pan will help keep its shape. The slightly square sides make it great for sandwiches or traditionally shaped toast, bread etc.
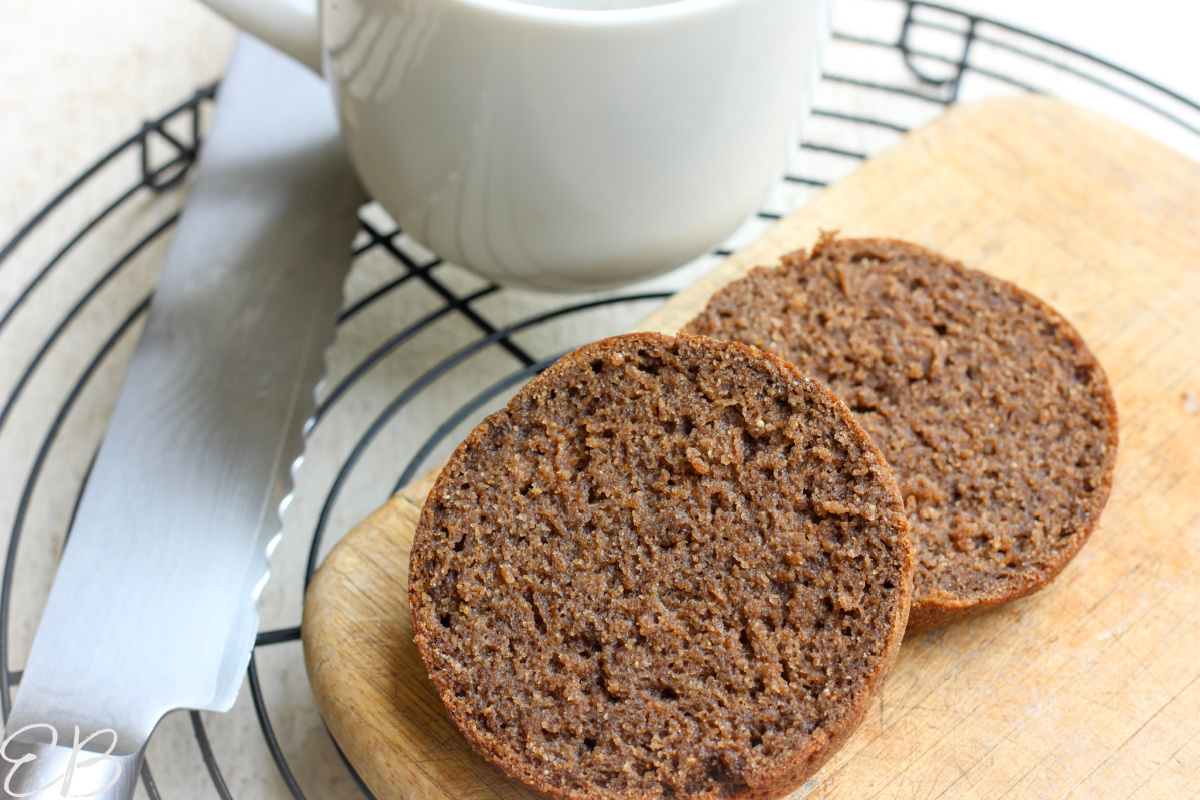
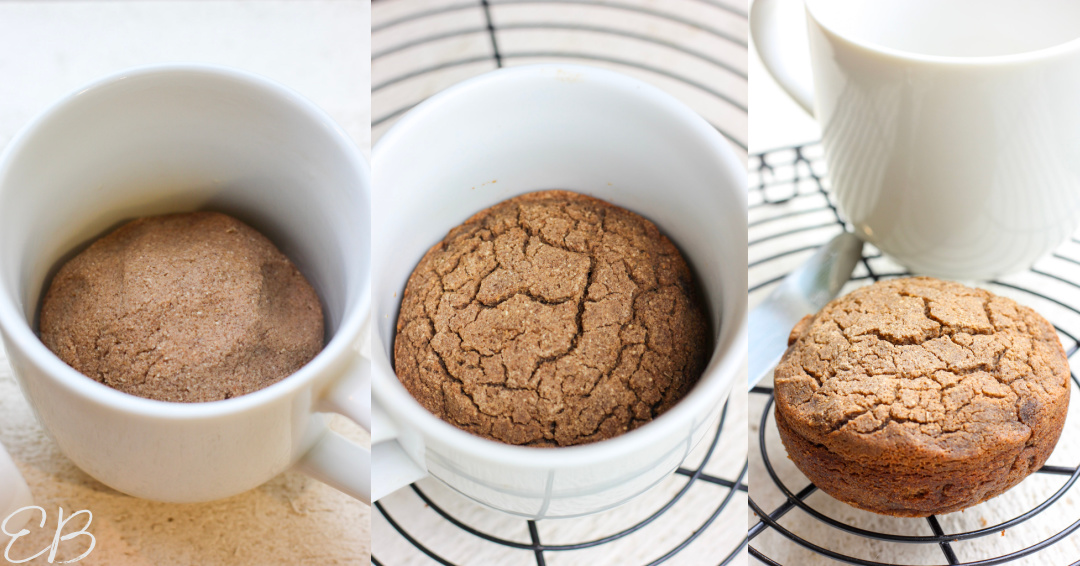
- Baked in oven-safe mugs or in ramekins, to create English muffin type shapes of toast or bread. This method also turns out very well and gives you a lovely circle of bread. When sliced in half, 4 loaves provide 4 to 8 servings.
- “90-second bread” in the microwave. To do this: Grease 4 mugs lightly. Cook each one separately. Microwave time depends on your microwave: 90 seconds to 2-1/2 minutes each, until mounded and firm. Run a butter knife around the edges; then flip onto a plate or napkin to release.
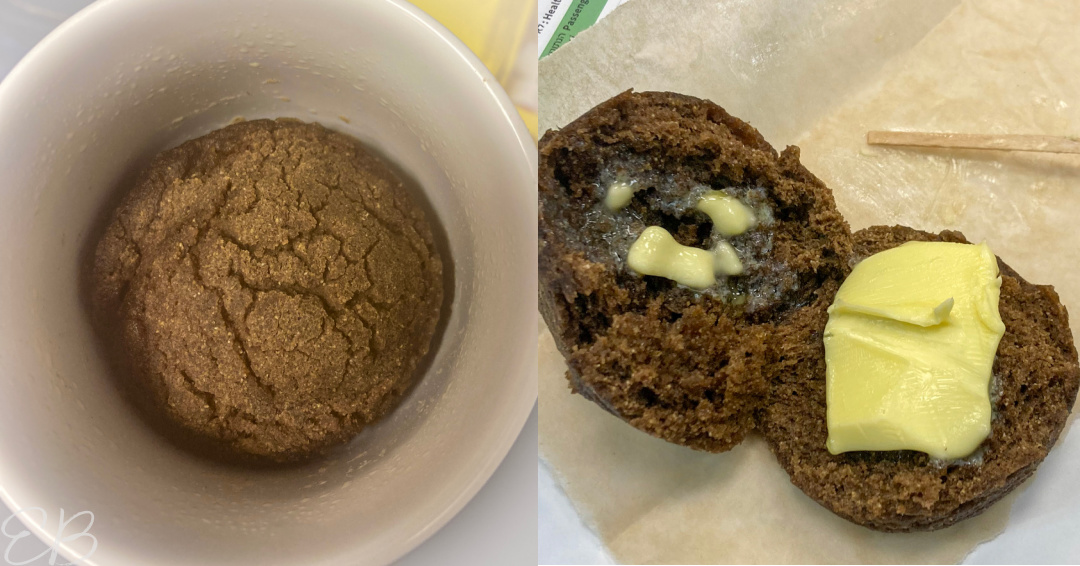
- Cut into half-inch slices. Or break open like a roll, and fill with fillings of your choice.
- See exact recipe Instructions for mug breads — oven or microwave — in the Notes section below the main recipe.
Other options:
- Because this dough is so easy to work with, you could literally make it into almost any shape you like. This includes rolls, dinner rolls or flattened sandwich buns. I’ll be trying these in the coming weeks and will add photos/updates.
Can you double the recipe to make a big loaf
- I have not yet tried to double this recipe. I probably will not.
- The best versions of this recipe are the little loaves. They bake totally evenly. In the half loaf, there is a slight color variation inside the loaf.
- With a full size loaf, this will happen more, just a slight uneven cooking. But, it will work.
- If you try it, be sure to reduce your oven temp to 325° F, to prevent the outside of the loaf from getting too dark while the inside cooks enough.
- Also, the larger the loaf, the more cracking on the crust, so it will be a little more crumbly, too, when sliced.
How to store Best Easy AIP Bread Recipe
Storage: Leave baked bread out on the counter in a sealed container, or refrigerate if you plan to toast it — both for a total of 2 to 3 days.
If it dries out a bit by day 3, either toast it, or for the fresh bread texture:
- Spritz it with water from a spray bottle, or very quickly/lightly under the spray feature of your kitchen sink.
- Then place in the oven or toaster oven at 325° F, to warm and re-moisten it. Sprayed bread yields a fluffy soft texture again once warmed.
To freeze: Seal in airtight container for up to 3 months. If you wish, slice first, so it’s easy to just break apart a piece or two to defrost for single servings.
Defrost by leaving on the counter for 4 hours or overnight, or toast to defrost.
Best EASY AIP BREAD Recipe (Fast! Egg-free, Paleo, 90-Second option)
Equipment
- 4 small pans such as this pan (recommended) OR oven or microwave-safe mugs or ramekins
- OR ~ 1 small loaf pan 8"x4" or similar OR a baking sheet, for a free-form loaf that is rounder on the sides
- parchment paper if you use a baking sheet or loaf pan
- electric mixer I use a handheld mixer.
Ingredients
- 1 cup green banana flour
- ⅔ cup coconut milk (not cold) OR tiger nut milk for coconut-free (For non-AIP, also okay to use other milks.) It's very important that the milk is not cold. It needs to be room temperature or warm-room temp.
- ¼ cup tiger nut flour <-- This brand
- 6 Tablespoons water room temp (not cold, warm or hot)
- 2 Tablespoons coconut flour (optional) For coconut-free, add 2 more Tablespoons tiger nut flour.
- 2 Tablespoons gelatin Use discount code BEAUTIFUL10 for 10% off your entire order.
- 2 Tablespoons oil: avocado or MCT oil (Probably olive oil is fine, too.)
- 2 teaspoons lemon juice or apple cider vinegar
- ½ teaspoon baking soda
- ½ teaspoon sea salt
Instructions
- Preheat oven to 350° F. Choose your pan/baking dishes (See Equipment section above Ingredients for size and shape options). If you're using a pan/dish that sticks, grease with oil, or line with parchment paper.
- Measure water, then sprinkle gelatin over and into water. Whisk a few times. Set aside for 10 minutes to thicken while you measure the flour and the oven preheats.


- Pour the green banana flour, tiger nut flour and optional coconut flour into a medium-large mixing bowl. Add the baking soda and sea salt, and stir to combine.
- To the gelatin mixture, add milk (make sure it's not cold), oil and lemon juice/vinegar. Smash together with a fork, and stir, so there is no longer a soft clump of gelatin. (Milk that is too cold will not allow the gelatin to soften and smash in evenly. Be sure your milk isn't cold. If for any reason your gelatin is too hard to smash in, warm the liquid ingredients gently until they're all smooth, then add to the dry ingredients and proceed.)

- Pour the wet ingredients into the dry, and mix well to combine. I use handheld electric beaters. Beat for a total of about 50 seconds: after the batter comes together, go another 15 to 20 seconds. It will look slightly whipped. I start at the lowest speed, and then increase the speed to medium the final 10 seconds. (Note: If your coconut milk is on the warmer side, your dough will be thinner than in the next two photos, more like a thick batter. So you won't be able to shape it. But, it will still bake up perfectly.)
- Scrape dough into prepared baking pan/dishes, and shape so the dough is smooth and slightly mounded on the top. You may also use your hands to shape the dough.
- Bake in preheated oven. If you've divided the dough into 4 pans or dishes, bake about 20 to 24 minutes. Tops will be mounded and cracked. Toothpick inserted into the center will come out dry or with a few moist crumbs adhering. For larger single loaf, bake time will be about 40 minutes.

- Cool in pan on rack for 20 minutes, then unmold and finish cooling on rack.

- Slice any direction you like, eat as-is, or toast first. Eat as bread or toast, as a side dish or for sandwiches.
Notes
90-Second AIP Bread recipe
Prepare recipe as instructed above. Then prepare mugs:- To make this recipe in 4 mugs, grease them lightly.
- Divide dough between 4 greased mugs. Mound it slightly if you want a cooked roll, or flatten it if you want more of an English muffin shape.
Microwave Instructions
- Cook each mug of dough one at a time. Depending on your microwave, cook times vary between 90 seconds to 2-½ minutes. So check your bread after 90 seconds, and then keep going if it isn't fully cooked.
- Bread is done when it's firm to the touch and evenly mounded in the middle. (See photos below.)
- Run a butter knife around the edges; then flip onto a plate or napkin to release, let cool slightly, then slice or break open to put on toppings/fillings.
Oven Instructions
- Preheat oven to 325 degrees F.
- Place mugs on large baking sheet so they're easy to put in and take out of the oven.
- Bake 25 minutes, until bread is firm to the touch, tinged with darker brown and toothpick comes out clean or with a few moist crumbs adhering.
- Let cool slightly. Run a butter knife around the edges; then flip onto a cooling rack or napkin to release, and allow to cool on rack before slicing in half. Cool fully if you wish to cut in thirds.
Nutrition
You can Pin this recipe here:

Similar AIP bread recipes you’ll love:
- Paleo AIP Sourdough Sandwich Bread
- Tiger Nut Flour Tortillas
- AIP & Paleo Cassava Flour Biscuits
- Sausage Biscuits
- Plantain Waffles
- Cassava Flour Waffles

Maria says
Hi! It’s great but I can’t find in my country tiger nut flour
Is there any substitute?
Tks
Maria
Megan says
Hi Maria, sadly, no. In AIP and egg-free recipes, ingredients can’t be subbed usually. And tiger nut flour is one with a very distinct role that no other flour can emulate.
Mary Bowling says
I’ve read that you can substitute tigernut flour for almond flour, so just maybe you can substitute almond flour for the tigernut flour.
Janessa says
Oh wow, this looks so great and I love how fast the recipe is. I need to pick up the ingredients so that I can make it! Thank you for including directions to make it into buns/english muffins.
Megan says
You’re welcome, enjoy!
Shelby says
Aside from the fact this bread came out amazing, I had all the ingredients on hand already! Definitely a new weekly staple.
Megan says
YAY, Shelby! Great to hear a reader’s results, so thanks so much for commenting and sharing! So glad you love the bread and that it will be a new staple! 🙂
Bananabug says
So my gelatin “egg” turned completely solid. When I tried to break it up it just resulted in large clear chunks..I wasn’t sure if we were supposed to use cold or warm water so I used lukewarm water. Maybe that was my mistake? Any tips? I’m waiting to see how the bread turns out with the huge chunks of gelatin in it.
Megan says
Hi and oh no. Room temp water. Then, use a fork to mash the soft clump of gelatin into the milk and other liquid ingredients before adding to the dry ingredients. I will make a note on the water temp! Also, someone else had this problem also, so I recipe tested more to try and figure out the cause. Just in case this happened with you: Milk that is too cold will not allow the gelatin to soften and smash in evenly. Be sure your milk isn’t cold. If for any reason the gelatin is too hard to smash in, warm and stir the liquid ingredients gently (including the gelatin) until they’re all smooth, then add to the dry ingredients and proceed. This solves the problem, and the loaf comes out perfectly. It just results in a thinner dough/batter before baking.
nancy says
i couldn’t believe this was 90-Second bread recipe. what a wonderful concept. It turned out perfectly too using your easy instructions
Megan says
Yay, Nancy, so glad and thanks so much for sharing! I love the 90 second version, too. We don’t have a microwave, but my husband does at his work, and it’s pretty fun how well the recipe works with that cooking method.
ChihYu says
I love the little loaves – perfect for entertaining or a cute lunch spread! I also like that they freeze well – great for meal prep
Megan says
True true! 🙂 So glad you like the little loaves, so fun, creative and practical. Yay, and thanks for commenting! Very cute for a lunch spread, well said.
Laurel says
Do you have any tips for incorporating the gelatin? There were lots of chunks of gelatin as I was making the loaves. My loaves came out about the same size as they went in the tins and seemed a little tough on the bottom.
Megan says
Hi Laurel, did you use room temp water? (Not cold or warm/hot.) The gelatin plus water should create a soft mash. It gets smashed into the coconut milk before being beaten into the dry ingredients. Did you do those two steps?: Smash into coconut milk with fork, and use electric beaters to beat in? Also, the coconut milk can not be cold. It needs to be room temp or warm.
Sheila says
Curious if just water could be used instead of the coconut or tiger milk….especially since tigernut is mostly water? Do the milks add something needed? I know coconut milk has fat but do not consider tigernut ha ingredients much and that is what I would be using if any. Thank you.
Megan says
Hi Sheila, I have not tried to make this recipe with water instead of milk, so I don’t know how it will do. But please let us know your results if you try it and it turns out well. Thanks!
Sheila says
Just made this recipe today using only water and all tigernut flour. The flavor of the bread is great … like a mild rye. I should have made the leaf shorter and fatter. The loaf was crusty on the outside but a little gooey texture on the inside just. Both of these made it difficult to slice. If I would have baked longer the crust would have been even crustier. It was very good otherwise. Would using the coconut flour have made a difference in this case?
Megan says
Every change you make to the recipe will cause it to be less good and less successful. So making one change, like milk to water, if it works, will still make the loaf less good. But changing flours in an AIP baked good or egg-free baked good will almost never work. Did you still use the green banana flour? Yes, the coconut flour would help.
Sheila says
I did not have green banana flour nut have had plants on flour for a long time so I used that as I searched and saw it could be subbed 1:1.
Sheila says
UPDATE: tried the leftover bread today a d it was perfect…. I think it was too warm still when trying to cut it.
Megan says
Great to hear, Sheila! 🙂 Thanks for sharing your update!
Sonia Gomez says
Hi 😊. I would like to know if the mini bread pan is safe or if by any chance get scratch it will leach aluminum?
Megan says
Hi Sonia, good question. It will not leach. It is aluminum, and thus is perfect for baking. It will only leach if you bake actual straight acidic foods like lemons or tomatoes. (Aluminum is the choice of professional bakers.) But health-wise, I feel confident using it.
Sarah says
I ordered banana flour just to try this…sad to say that my gelatin was also very hard and difficult to incorporate. The loaf was cracking and crumbly and did not rise well enough to slice. Wondering how to salvage—bread pudding or as crumb topping for a crisp? Flavor wasn’t bad. Maybe I’ll try again next month using the microwave?
Megan says
Hi Sarah, I’m sorry for the delay in responding (as I was traveling abroad and am now catching up on Comments). Because someone else had this problem, I recipe tested more to try and figure out the cause. Just in case this happened with you: Milk that is too cold will not allow the gelatin to soften and smash in evenly. Be sure your milk isn’t cold. If for any reason the gelatin is too hard to smash in, warm and stir the liquid ingredients gently (including the gelatin) until they’re all smooth (and melted), then add to the dry ingredients and proceed. This solves the problem, and the loaf comes out perfectly. It just results in a thinner dough/batter before baking.
Donny says
Finally a way I can use my tigernut flour! And they came out perfectly in the oven, too. Definitely making again.
Megan says
Great, Donny!! Yay, and thanks so much for sharing!
Jennifer says
can we leave green banana flour out? My body does not like it.
Thanks
Megan says
Hi Jennifer, sadly, no. This egg-free recipe is very exact and subs can’t be made that I know of.
Brenda says
Just found your website and love it! Ready to try the bread! Can I sub a pastured egg for the gelatin? If so, how many eggs? We prefer them to gelatin.
Thanks!
Brenda
Megan says
Hi Brenda, yay! So glad to have you here! I haven’t trialed this recipe with an egg, so I don’t know. This recipe I created on purpose from scratch to be egg-free, so it’s hard to say. If you want to experiment, I’d start with one egg, minus the gelatin and 4-6 T of the water. If you have success, I’d love to here. Thank you and blessings!
Megan says
I think your milk was too cold. This will not allow the gelatin to soften and smash in evenly. Be sure your milk isn’t cold. If for any reason the gelatin is too hard to smash in, warm and stir the liquid ingredients (in a small pot over low heat, stirring) gently (including the gelatin) until they’re all smooth, then add to the dry ingredients and proceed. This solves the problem, and the loaf comes out perfectly. It just results in a thinner dough/batter before baking.
Heather says
Just tried this, and followed the recipe exactly (other than different brands of gelatin and flours).
I didn’t get much rise, but it was probably because my bread pan was non-stick and greased. I will not grease it next time to see if I can get more rise out of it.
Also, my dough was much wetter. It was like a thick cake batter.
It tasted really good, so I’m hoping to try again. It was a bit gummy though. My toothpick came out clean, so I assumed it was done. I would really like to get more rise out of it! I’m going to do some experimenting to see if I can have any success.
Megan says
Great, Heather, I’d love to know how your next batch goes and any nuances you notice for success. I’d make sure your baking soda is good. Hopefully you can get it perfect.
Dina says
I just started AIP for my daughter and this was the first bread that I tried. It turned out great! I did struggle with the texture when beating with a hand mixer because the dough was very thick and sticky. I also struggled to shape it as it was sticking to my hands. I think I did something wrong, but not sure what. My milk was room temp. Gelatin broke up easily. Any thoughts are greatly appreciated!
Megan says
Oh I wish I could have done it with you to see every little step and ingredient. I’m so glad you loved the bread and that it turned out great! If there’s one thing I’m learning from everyone’s comments on this recipe, it’s that I need to make the time to create a video for it, to help avoid any issues. Super happy the gelatin wasn’t an issue, but I’m not sure why your dough was extra sticky. But, especially it being your first AIP baked good, YAY that the baked bread turned out great!! I’ll try to do a video of it soon, and maybe that will help. Thanks for your review and comments! 🙂
Dina says
So I tried doubling it. I lowered the temp to 325, but despite baking even 10 minutes longer the toothpick was coming out gooey. Since the outside was starting to get really crusty, I took it out. It wasn’t bad, but the insides were not perfect, so I’m going to go back to making mini ones because I love how smaller ones turned out! Thanks again, this is now my go-to bread!
Megan says
Thanks for the feedback, Dina. So glad you love the recipe as-is and it’s a new staple for you! 🙂
Dina says
Now that I’ve made it precisely as you suggested, using the same mini loaf pan, I can honestly say that your recipe is PERFECTION! I am finding other delicious recipes on your site and I am so thankful I found it!!!
Megan says
Great, Dina!!! YAY, and thanks so much for sharing!! 🙂
apple says
Thank you for this recipe! I made the oven version in the pan you recommended, and it came out exactly as described and pictured. It is so delicious, so easy to make, and so thrilling to finally, after many years, be eating bread again!
Megan says
Yay, Apple! Thank for sharing!!, and I’m so glad! Yay for AIP bread! Blessings!! 🙂
Lindsay Bjorn says
This looks wonderful! I’m Can’t wait to try it. Do you happen to have the nutritional facts for it? Thank you!
Megan says
Hi Lindsay, great. Yes, they’re located just below the recipe itself.
Kinda says
We don’t have (green banana flour) nor (tiger nut flour) where i live.
Please share alternatives even if the bread will not come out perfect.
Thank you
Megan says
Hi, I wish I could, but there just aren’t subs for these precious few AIP flours. Egg-free baking is quite limited. So sorry!
Renee says
OMG, this is so delicious!! I haven’t had bread in 2 years and this is so good and so easy to make. I almost wish I wouldn’t have made it because now I need it everyday! Thank you for bringing delicious bread back into my life.
Megan says
My pleasure, Renee, and thank you for the glowing review, how encouraging!! Thanks for sharing! Yes, balance is a tough one, but now you’ll figure that out, and it will work out great! I, too, love how easy and fast this bread is to make. YAY! By the way, I want to hear from more readers who’ve made this recipe: Was your dough before baking thick or thin (thick like in the photos or runnier than that)? Thank you! I want to make sure any variations are apparent beforehand for bakers. I know both versions turn out the same after being baked, but it seems some people’s dough is soft, malleable and shape-able, and others’ is runnier and is scraped into the baking pan. (Perhaps due to the brand of gelatin, so what brand of gelatin did you use?) Thank you!
natasha says
Thank you so much for this recipe!! I always thought gluten free breads from the store were always so terrible tasting and now being grain free we couldn’t have it anyway. I made this with the 2 flour method and I can’t stop eating it!! It’s so light and fluffy with incredible taste. I followed your notes exactly. thank you for all the tips! My daughter is so happy to have bread back in her life!
Megan says
Yay, this makes my morning; I’m so happy to hear, Natasha, and especially how it’s blessing your family and filling a need you have! Thank you so much for sharing, and my pleasure! 🙂
Karen says
Could a flax seed egg be substituted for the gelatin egg? If so, what do you recommend for the amount of flax seed and water? If not, is there something else that you recommend? Thank you for providing this recipe! I hope there is a substitute for the gelatin egg. Thanks.
Megan says
Hi Karen, I haven’t tried it, but theoretically it should work. Let us know if you try it.
Heather says
Megan, I love your recipes! I really appreciate you making them available and the effort you put into creating them. I want to offer a small suggestion though. Would you consider listing ingredients in the order that they are used in the recipe? If I were reading the list of ingredients, I would assume that Green Banana Flour would be added to the bowl first, followed by coconut milk then tigernut flour, and so on and so forth. But when I look at the recipe, the first thing you mention is the gelatin and water mixture. I will usually download your recipes to my Paprika app and rearrange the ingredients into the order they are mentioned in the recipe (this makes it easier to run down the list and check off things as they are added and seems to be standard with recipes in general). But I thought I would also offer it as a suggestion, in case anyone else struggles with this as I do and find many of your recipes just a tad less approachable because of it.
Megan says
Hi Heather, yes, I will consider it! I have long written my recipes like that because I prefer it as a cook, but I know the other method has become more popular. I have had two other readers (in 9 years amidst millions of readers) ask me to change it, too. Yours is maybe touching me at the right time. It might finally be time! Thank you, and blessings!
Jana says
I do the same rearranging of ingredients in my app so they are in the order they are used in the recipe.
Megan says
Hi Jana, I did make the switch! So all of my new and newer recipes have the ingredients listed in the order they’re used. 🙂
Nicole says
Thank you so much for this recipe. I tried making it, but I was not very successful. I followed all the steps, I was not happy with the results. The dough did not rise and I did not get the firm consistency of a bread like the one in your pictures. Mine turned out very “crumbly”. But the taste is ok. What do you think I did wrong?
Thank you in advance for your reply.
Megan says
Hi Nicole, I’m sorry for that experience. If your bread did not rise, then I’d question your baking soda, but it’s hard to know about which other factor could have played in as well. I started making a video for this recipe, but with having just adopted, I can’t quite manage the time to finish it yet! I hope to add that in the future.
Mrs Joanna Eden says
Hi,
I can’t consume gelatin because of histamine intolerence, but I need an AIP bread. Will it work omitting the gelatin?
Megan says
I’m so sorry, no. The gelatin replaces eggs. Perhaps you could look for a flatbread, so eggs aren’t needed. If you can have cassava flour, that makes a wonderful tortilla. (Side note, here’s my article about how I overcame histamine intolerance, in case you’re interested: https://eatbeautiful.net/mcas-histamine-lectin-intolerance-tips/) Best! 🙂
Joanna Eden says
Thank you, Megan. Cassava flatbread sounds great. I also need a loaf recipe, and yours looks so delicious that I might give the gelatin a go. Hayfever season is nearly over here, and I’ve been eating low histamine for some time, so I may be fine. I’ll let you know how it goes.
Thank you again for your support.
Best Wishes,
Joanna
Megan says
Okay, I hope it goes great!!
Juli says
I made this exactly as you stated and it was awesome! I even bought the mini loaf pans that you recommended. I was worried that it might be too sweet but it wasn’t. I ate a little loaf with this tasty carrot/turnip/butternut soup that I make and it was great! The only thing that I would do differently is press the dough into the pan more. I treated it like bread with gluten and left it sort of like a lump/ball. It wasn’t as pretty as your photos, but this will go onto my rotation for sure. With out being too dramatic, AIP is so hard sometimes especially for a bread and cheese fanatic. Thanks for creating this little gem!
Megan says
Hi Juli, so nice! I am so glad to hear. Thank you for sharing all of your details! 🙂
Emily says
Hello! Do you think that this recipe would work if baked in a Dutch oven? Thank you!
Megan says
Hi Emily, I can’t imagine actually. Let us know if you try it.
Sonia Gomez says
Hi. I’m so glad that I find your site. I’m dealing with Hashimoto and I need to lower my antibodies so hopefully the AIP diet helps me.
I was going to use the link that you provide for the mini loaf baking dish to order it ,but I didn’t do it because it says that are made out of aluminum.
I would like to know your thoughts about how safe is baking wit that material.
Please let me know Thanks
Megan says
Hi Sonia, sure, and best wishes on your wellness journey! I usually share a bit about that topic when I link to aluminum pans, so I’m sorry I didn’t do that here. Aluminum is safe when it’s used for baking, as long as no acidic ingredients are used, and is the best conductor of heat for baked goods, preferred by professional bakers. Mainly avoid lemon juice and tomatoes, things that can react with aluminum. Otherwise, it will not slough off. If you like, you can also line any aluminum pan with parchment paper.
Heather Fagan says
Delicious! This will be a staple in my kitchen. Thank you!
Megan says
So glad to hear. You’re welcome!
Jennifer Henley says
Hi! Will plantain flour work in this recipe instead of the green banana flour?
Megan says
I’m sorry, Jennifer, I haven’t tried it. Let us know if you do.
Gina says
Hello, I have been on AIP for only a little while but really wanted some bread, this recipe is great, Thank you so much.
Megan says
You’re welcome, my pleasure, Gina, so glad. 🙂
Saskia says
I just thought I’d comment for anyone wondering about ingredient substitutions for those in the reintroduction phase of AIP or who don’t need a strict AIP recipe.
I subbed almond flour for tigernut, and used a large egg (UK size, use extra large in the US) in place of the gelatin (then omitted the water to compensate for the added liquid in the egg). I baked mine in a muffin tin for 12 individual bread rolls.
It turned out pretty good, although the texture is a bit “cakey” (this is usually the case with AIP style breads, though, as it’s hard to get a very bread-like texture without gluten or gluten replacers). I also found it a little salty so I’d reduce the salt by about half if I make them again. Obviously due to my substitutions I can’t be sure the texture or saltiness is the same in the original recipe, so take that with a pinch of salt (no pun intended!).
I didn’t give a rating because I didn’t cook the recipe as written, but I’d give it a 4 based on what I actually made!
Kristin Parks says
I’m so thankful for this bread recipe! I used a silicone muffintop tray and they turned out delicious. I used room temp water and room temp coconut milk but my gelatin still had large lumps do I used an immersion blender and it ended up nice and smooth. These taste great! Thank you for the recipe!!!
Megan says
Thanks for sharing what you did, and for your photo! YAY, so glad you love the recipe!! 🙂
Heidi says
I’d like to try this using cassava flour – is that possible?
Megan says
Hi Heidi, I’m sorry. This recipe is so fine-tuned that no subs will work. Egg free baking is very challenging and coming up with this exact recipe took some work lol … so it needs to be made exactly as written.
Susana says
Is there a substitute for the Gelatin? I can’t have eggs…
Megan says
Hi Susana, the recipe hasn’t been tested with those few alternatives that may work, sorry.
Tammi says
I made this bread and like the taste but it didn’t rise much. I wanted to ask about weight measurements. There can be such difference in how much flour gets pushed into a measuring cup that weights seem to feel more consistent. I went by the package weights to get to your same “cup” amounts and maybe my water was too warm but I’m going to start with new baking soda first. Any input?
Megan says
Hi Tammi, maybe I can indeed add the weights at some near future time. I add those to my newer recipes, but this one didn’t get it. When I measure dry ingredients, I scoop the flour in with a spoon, and then level off with the back of straight knife.
Dan says
This was a great recipe. I made hamburgers for dinner, and decided at the last minute to make a bun rather than lettuce wrap it. I made a 1/4 of the recipe, kept the batter in the pyrex, and then baked it for 90 seconds in the microwave. Perfect sized hamburger bun for one. Amazing! This is going to be my go-to recipe for hamburger buns from now on.
Thank you so much for sharing!
Megan says
Wow, great use of the recipe!! Thanks so much for sharing what you did, and I’m so happy to hear.