I may receive a commission if you purchase through links in this post. I am not a doctor; please consult your practitioner before changing your supplement or healthcare regimen. As an Amazon Associate I earn from qualifying purchases.
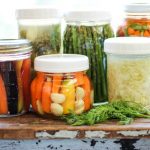
How to Ferment Any Veggie shares the recipe for making probiotic fermented vegetables from any veggie! You’ll love the flexibility and creativity this master recipe invites.
Eating fermented vegetables may be excellent for your health, but making them is also one of life’s pleasures. The more you make probiotic pickled vegetables, the more you’ll experiment and love making them.
This post gives you several recipes, a template for how to make sauerkraut and fermented veggies (with a saltwater brine) and also shares the tools you’ll need and several tips for success.
(Here are two of my recent favorite fermented vegetable recipes: Brussels Sprouts with Garlic and Ginger, and Golden Cauliflower Pickles with Turmeric)
Why eat fermented vegetables?
- Protect the body against infection by stimulating the immune system.
- Improve the digestion process: Fermented veggies help to break down proteins and carbohydrates, thus requiring less insulin for digestion.
- Provide an excellent source of antioxidants.
- Help fight candida and other yeast overgrowth.
- Keep flora balanced throughout the digestive tract by eating them regularly.
- Increase the bioavailability of vitamins and minerals.
- Reduce blood glucose levels.
- Gradually overcome SIBO or histamine overload with the slow reintroduction of probiotic foods (more on this below).
What are fermented vegetables and how do you make them?
Vegetables, especially cabbage, naturally have lactic acid bacteria on their surfaces. Vegetables about to be fermented are cut or shredded to expose more surface area.
We pound to break down their cellular walls, allowing their juices to release. We salt during this process, which also helps to release their juices.
How long to ferment
After being stored in jars or a fermentation crock, as detailed below, they are fermented at room temperature and then sometimes stored in the refrigerator, keeping for 2 to 6 months or longer.
During the fermentation process, lactobacillus bacteria transform starches and sugars into lactic acid.
Why salt is important
The salt in the fermentation brine helps to hold any decomposition at bay until beneficial acids and enzymes develop, to continue the process of preservation.
The bacteria are anaerobic which is why all air must be pressed out during the fermentation process. A warmer home, 70 degrees or higher, will speed up fermentation. A cooler home will slow it down.
Why whey is sometimes used
Whey is sometimes used with fermented vegetables to jump start the right bacterial growth and inhibit unwanted bacteria. Whey is not needed if enough salt is used in one’s brine.
Salt functions to deter negative bacteria while the vegetables’ own lactic acid bacteria increases.
Which probiotics are in fermented vegetables
Six species of lactic acid-producing bacteria may be naturally present in many vegetable fermentations: Leuconostoc mesenteroides, Pediococcus pentosaceus, Pediococcus acidilactici, Lactobacillus brevis, Lactobacillus plantarum, and Lactobacillus pentosus.
Various species of yeasts are also present in selected vegetable fermentations, such as those in the cucumber family. (source)
Specific recipes
I have included some favorite recipes below. One thing I love about vegetable fermentation is you can be creative. As long as you follow basic principles (I outline these below), you will usually be successful. An occasional batch that doesn’t turn out is an educational experience.
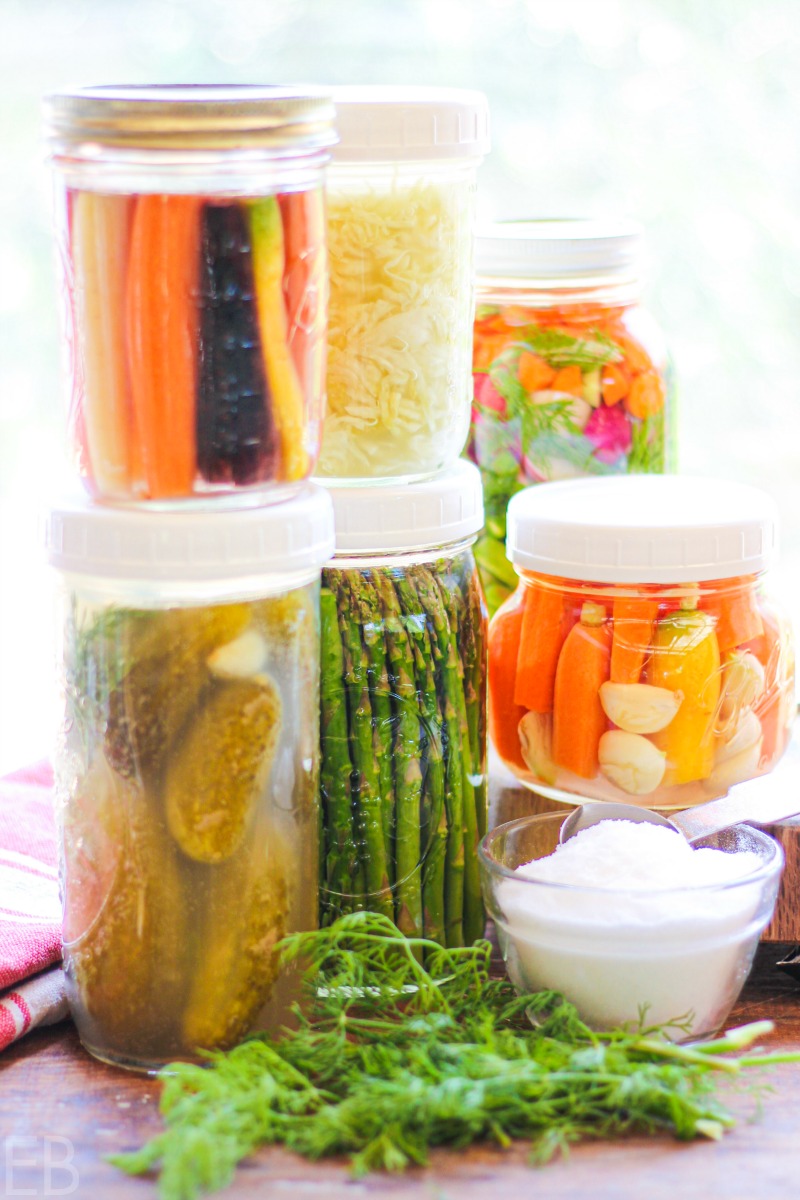
You will need the following supplies and ingredients:
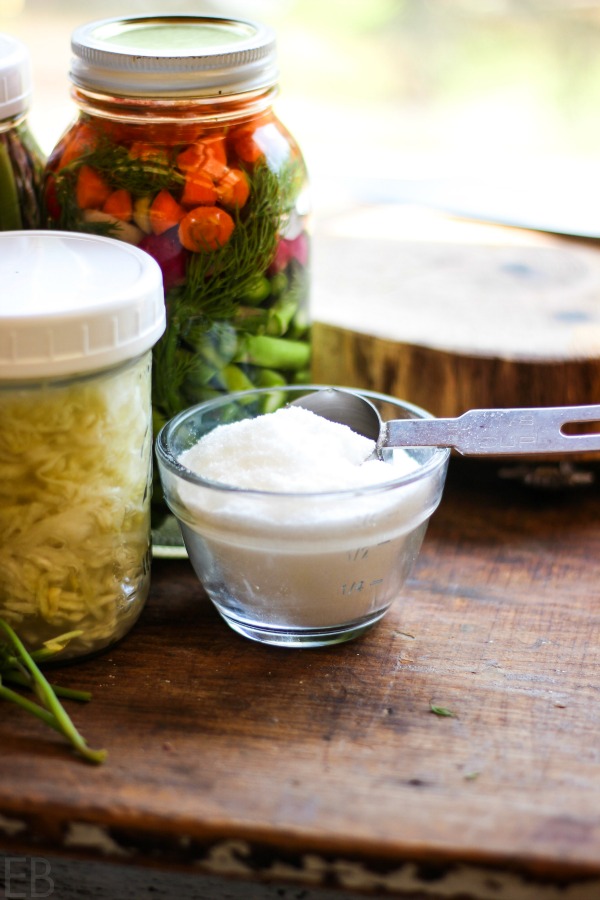
- Sea Salt (not table)
- Non-chlorinated water
- Organic vegetables, well washed (and other optional food ingredients listed below), room temperature ideally
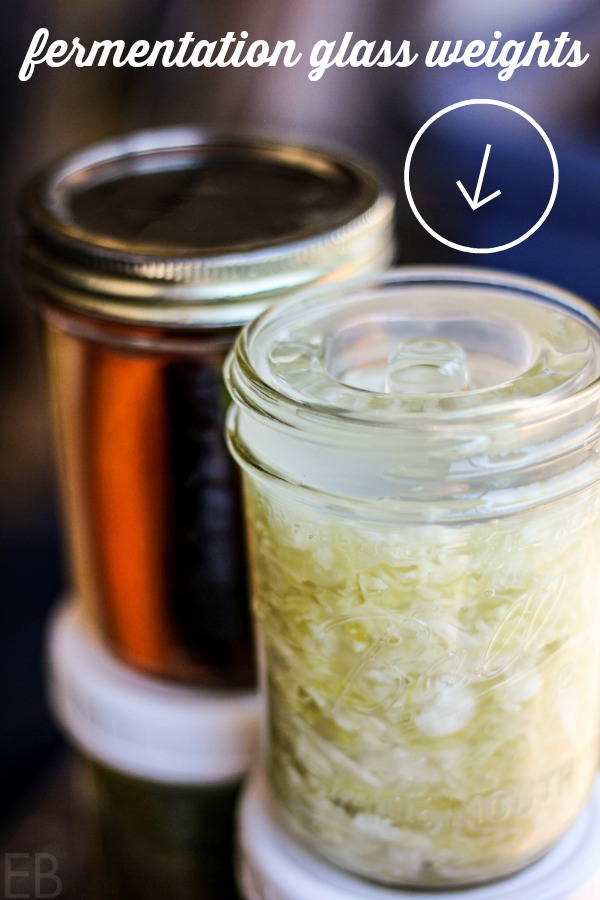
- A good flawless crock, or clean canning jars with lids, airlock fermentation lids (recommended for success!) and weights, or this Korean fermentation container
- Optional, depending on the method and vessel you choose: If you choose to stamp (I define this below), a two-gallon unscratched plastic bucket, stainless steel bucket, good deep wooden bowl or your fermenting crock (if you have one)
- Optional supplies that may be needed include: zip-lock plastic bags, dish towels and a wooden stamper
Basic Principles for Fermenting Success
- Have all your cooking surfaces, tools and vessels clean.
- Use non-chlorinated, filtered water.
- Don’t skimp on salt unless you’re using a starter. This will ensure negative bacteria are held at bay while your ferment gets going.
- Most importantly, use airlock fermentation lids (these are GREAT and ensure success!!) Use fermentation weights, a fermentation crock with insert or another effective weighted system to create an anaerobic environment. Your veggies must be completely submerged under the brine and remain that way.
- Check your ferment a few times within the first 72 hours to make sure your veggies stay under the brine.
Spoilage and Kahm Yeast
Spoilage is not common. If your vegetables turn brown on top, it means they’ve been exposed to air. Scrape off the spoiled bit and push down the rest under the liquid so they can’t rise up again. If the batch is truly bad, it will smell and look awful. Some dilution in the bright colors is normal. Even a teeny bit of mold on the very top can be scraped off or removed with whatever it’s touching. Nothing bad can survive in your lactic acid brine if it’s generally going the right direction. Clean produce, knives and work surfaces, as well as non-chlorinated water will help get your batches off to the right start.
A white yeast called kahm yeast can also appear on the surface. Kahm yeast is harmless but isn’t tasty. It should be scraped off also. See more about kahm yeast here if you are worried about what you have growing. Images and information about kahm yeast and other growths will set your mind at ease or give you insight. With fermenting, the rule is: If it looks and smells awful, throw it away. Otherwise, scrape it off and add more brine or re-submerge the veggies. If you do have to wipe away a yeast or mold, sanitize the top of the jar with a small amount of food-grade alcohol, real vanilla extract or apple cider vinegar. This cleanse gets the container off to the right second start. A pleasant, sour smell is to be expected.
Fermented Vegetable Recipes —
from Basic Sauerkraut to Probiotic Vegetable Medley Pickles
The first recipe I share below is a recipe card that uses my favorite salt-based pickling brine. With it, I make Basic Sauerkraut and Probiotic Vegetable Medley Pickles (no stamping and no whey). What follows the recipe card are several other basic sauerkraut recipes and guidelines that use the stamper method. While sauerkraut usually uses the stamper method (where cabbage is pounded to release its juices), sauerkraut can more easily be made with a saltwater brine. Stamping isn’t necessary.
You can read the recipes below and see which method and recipes appeal to you. The recipe card is a kind of template for using the brine method. While the recipes below it share the stamping process, they’re delicious recipes that can easily be adapted to the brine method.
Some cooks like the stamping process. It can be cathartic and feel old-fashioned in a nice way. While I enjoyed years of stamping, I do prefer the faster method! 🙂
Basic Sauerkraut or Probiotic Vegetable Medley Pickles (with saltwater brine, no stamping and no whey)
Equipment
- fermentation jars or crock
Ingredients
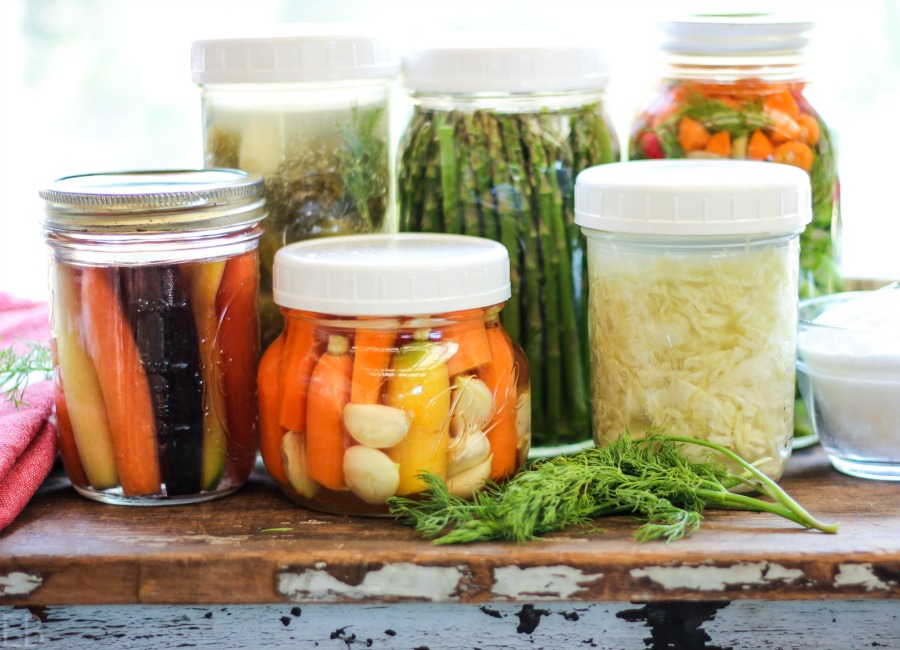
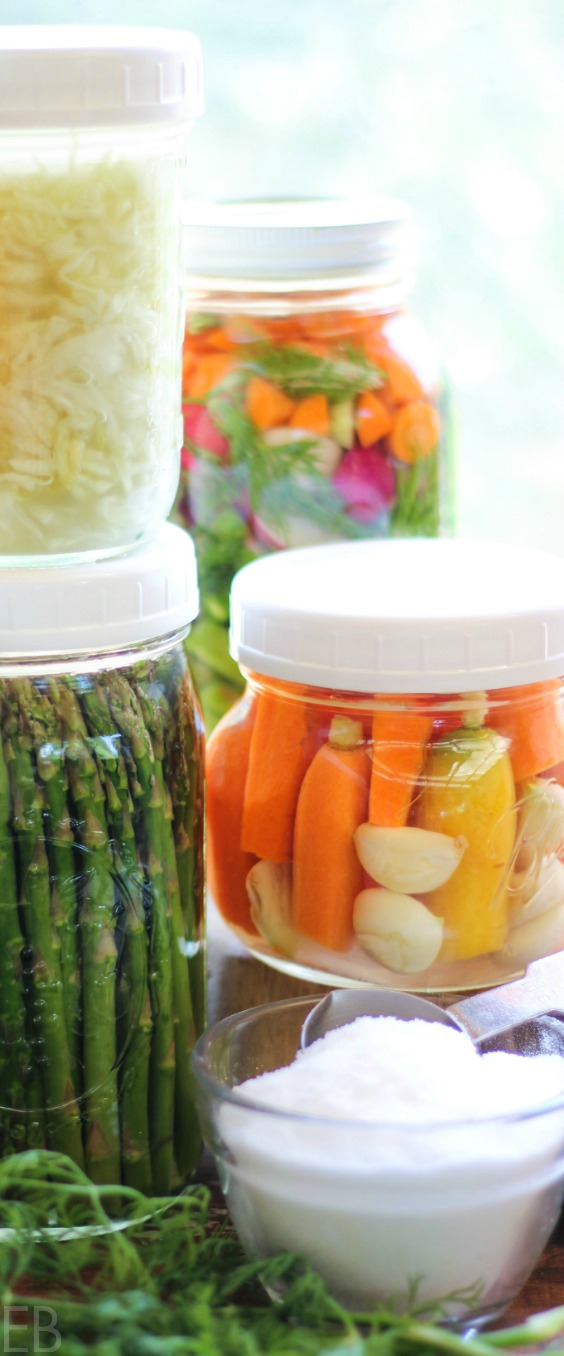
- 3 pounds vegetables : Choose any of your favorite seasonal vegetables, from your garden or the farmer’s market ideally, but even in the winter, good-quality market produce is fine: cauliflower, Brussels sprouts, green beans, asparagus, tomatoes, cucumber, zucchini, onions, peppers, rutabaga, kale, broccoli, carrots etc. OR for sauerkraut, use 1 big head cabbage, grated or thinly sliced
- 1 quart filtered water
- 2 Tablespoons sea salt
- herbs or spices , optional
Instructions
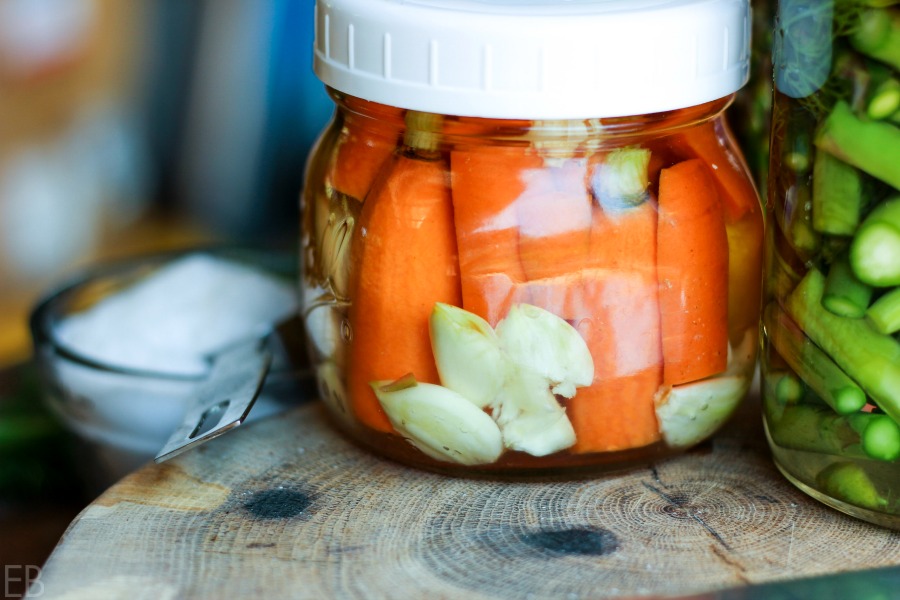
- For Probiotic Vegetable Medley: Chop the vegetables into bite size pieces or long slender slices, whatever looks pleasant to you to eat and see, and depending on which vegetables you choose. Arrange them tightly in your empty clean jar(s) or fermenting crock, either decoratively or hodgepodge-style. Include optional garlic, spices and herbs as you pack them in. If you're making sauerkraut, the process is a little different: See Step 3.
- Brine: To mix the brine, stir together (in a large mason jar, a 4-cup measuring dish with pour spout or whatever’s convenient) room temperature water with salt, to dissolve.
- Pour the brine over the vegetables to within two inches of the lid (or as high as you want for the crock). Anchor them down with extra-tight packing if you aren't using weights or an insert lid (like the one that comes with the Korean fermenting crock). Add weights or insert lid and press down as needed to release air bubbles, until the salt water level rises above your weights or insert.
- For Sauerkraut: Finely shred cabbage, discarding core. Place cabbage in large bowl with water and sea salt. Stir. Cover and set aside for 30 minutes. Stir cabbage again. Re-cover and set aside for an additional 30 minutes. Pack into jars or fermenting crock of choice. Pour any remaining salted water from the large bowl over the cabbage. Press down firmly to pack tightly and remove air bubbles. Add weights or insert lid, until the saltwater level rises above your weights or insert. After 12 to 24 hours, pack cabbage down again to make sure that it is beneath the brine.
- Vegetable Medley and Sauerkraut: Place the vegetables in a dark warm place for about one week, depending on the temperature of your home, until all bubbling action has ended. Optional: Transfer to your refrigerator for 3 to 4 weeks to mellow and develop the flavors before eating.
Notes
Extra Brine
If you have extra brine leftover after your fermentation process, you can use it for various things:- Drink it.
- Use it to jump start another batch of fermented veggies.
- Inoculate another ferment with it: sourdough waffles, grain-free sourdough bread, strawberry beet kvass.
Nutrition
Stamping Method for Sauerkraut
Specific recipes follow this method description. This method is what most kraut makers learn when first making sauerkraut. However, after years of stamping, I learned an easier method (which uses brine) which I share in the recipe above. Nonetheless, you may enjoy this old-fashioned technique, and I certainly want to share it here as a basic preparation method.
- For every quart of water and about 3 pounds of vegetables, you will need 1 to 2 tablespoons of sea salt. Fruit may also be used, especially apples, unwaxed organic lemons, and quinces … but even berries. Seaweeds such as dulse, kelp, and wakame are fun additions and add iodine as well as other minerals.
- Place two big handfuls of the veggies, about 2 cups, into your crock or bucket. Sprinkle with about 2 teaspoons to 1 tablespoon of sea salt. Now use your hands or a wooden mallet/stamper to squeeze or pound the vegetables. This is a slow but satisfying experience.
- As juices begin to appear, add two more handfuls of veggies and more salt. Repeat the process of squeezing or stamping.
- Depending on how much you want to make, one ½ gallon ball jar, multiple quart jars, or a big crock, continue in this manner until all the vegetables have been stamped and are swimming in a generous amount of saltwater brine. The whole squeezing or stamping process will take anywhere from 10 to 30 minutes, depending on how big your batch is.
- At this point feel free to add additional spices for added nutrition or flavor such as the following: juniper berries, turmeric, spirulina, mustard seeds, pickling spices, fresh ginger, cinnamon, cayenne, cumin etc. Fresh herbs, chopped dried fruit or raisins, lemon juice, or unwaxed rind, whey (not AIP), and even dried seafood may be added.
- Pack the vegetables and their juices into jars or your crock, using your clenched fist, fingers or the very handy stamper to press down firmly on the contents as you go, releasing all air.
- By the time you’ve packed your veggies to the top, the juice should rise above them by one inch and still leave two inches head space in the jar (if this is your storage container).
- The last step for some people is the trickiest, keeping the veggies DOWN. Be creative: Use folded outer cabbage leaves or grape leaves dipped in the brine; used dried fruit; use carrots sliced thinly length-wise, so they are flat and long; use a small all-glass jar perfectly fitted; use the optional ziplock bag listed above filled with saltwater; it will function as a weight (1 tsp. salt to 2 cups water), or just compact the produce so thoroughly that they don’t even think about rising up in aerobic rebellion. (The bag can be used on a plate if in the crock, if you can find one that perfectly fits the inside diameter of the crock. If in a jar, the bag is pushed down directly inside the jar and with a dishtowel draped over, no lid, till the fermentation is done. The saltwater is used in the case that the bag should break.) If using mason jars with lids, secure the outer part of a two-part lid over your airlock fermentation lid. NOTE: To avoid the hassle of the above options, I eventually switched to this crock OR the airlock fermentation lid + these weights. However, the above options are part of sauerkraut making history and important to pass down for times when handy tools can’t be obtained.
- Now your sauerkraut or veggies are prepped. Put them in a dark, warm place, ideally around 70 degrees Fahrenheit for about a week, until the bubbles are done rising to the surface. The process can take a lot longer than a week if your home is chilly or if it gets cold each night and reheats each morning. Usually a longer fermentation works out fine. Keep checking that the veggies are under the brine and amend the situation (no worries!) if not; this is a common issue. I had one batch take four weeks to ferment because the house was so cold each night, but it still turned out great. Just make sure that the bubbles have stopped rising and the fermentation action has ceased before moving the product to refrigeration. If the fermentation process is stopped short, the bubbling will continue in your stomach.
- Lastly, when the kraut is done, move it to the fridge. Most sources recommend leaving it to mellow for three weeks before eating it. But waiting is optional at this point. Keep in mind that each new recipe will be a knock-your-socks-off experience, taste-wise. Feel adventurous before taking the first bite!
Basic Traditional Sauerkraut — Stamper Method
Any of the below recipes can be made with brine, instead of salt plus stamping.
Ingredients
- 1 big head cabbage
- 2 tablespoons sea salt
- Caraway seeds, 1 Tablespoon (optional)
Method
- Wash the cabbage. Shred it by hand with a knife or a food processor.
- Place in bucket with sea salt and mix well. Leave for 15 to 30 minutes (optional), to allow juices to begin to exude.
- Use stamper or clenched fist to pound and press the cabbage. This may take a full 5 to 10 minutes, until the juices are flowing well.
- Pack the cabbage into your jar(s), layering caraway seeds or other spices you may like (mustard, celery seed, coriander, bay leaf etc).
- Pack the cabbage down tightly so that all air is pressed out and the brine rises above the vegetable.
- Put the lid on, and screw down loosely, allowing natural gases to escape.
- Place the jar(s) on a plate or pan, lined with a dishtowel or rag. Keep in a dark cupboard, preferably somewhat warm, or on top of a warm fridge, covered loosely with a dishtowel for darkness, for one week.
- When the fermentation bubbles have stopped rising to the surface, transfer the jar(s) to your fridge. If the bubbles are still active, wait, as this stage could cause gas in your gut. Once refrigerated, wait 3 to 4 weeks before dipping in. I have had my fruit and vegetable concoctions take as long as one month to complete their fermentation because of our cold home temperatures during the nights, so be patient if necessary.
Variation- Russian Sauerkraut Ingredients
- Use the head of cabbage, sea salt and caraway shown in the master recipe (above). But also add 3 carrots, 1 grated beet and fresh or dried dill.
- Follow the master sauerkraut recipe, stamping the carrots and beets at the same time as the cabbage and adding the dill, to taste, with the caraway.
Great-with-Chicken Sauerkraut
Ingredients
- 1 big head cabbage, grated
- 1-2 apples, sliced thinly or chopped
- ½ onion, sliced
- fresh lemon juice from one whole lemon and/or grated rind of 1 organic lemon or thin slices of 1 whole lemon
- 1 Tablespoon dried thyme or a sprig of fresh thyme into each jar
- 1 teaspoon allspice
- Sea salt
Method
- Follow the master sauerkraut recipe, stamping the apples and onions with the cabbage. Add the allspice to the brined vegetables and mix. Layer the lemon slices, if using, with the thyme. Alternately, mix the lemon juice or rind with the cabbage mixture and allspice before packing it into jars.
Note: I love lemon in the krauts, salty lemon … it’s a new flavor experience; so be open-taste-budded and let yourself acquire a taste for this sophisticated treat!
How Much Sauerkraut Should You Eat?
For sensitive systems, like those starting out the GAPS Intro diet, start with only half a teaspoon of the fermented vegetable juice. Otherwise, eat a minimum of 1 teaspoon fermented vegetables with every meal, three times a day. Or enjoy a fermented dairy product or probiotic beverage with breakfast and save fermented veggies for lunch and dinner. Eat up to a quarter cup of the vegetables at each meal, for optimum health benefits.
For those with SIBO or histamine intolerance (also called histamine overload), introduction of probiotics needs to be very slow to prevent exacerbation of symptoms. A tiny, safe dose for most with SIBO is to start with a single strand of sauerkraut daily or at each meal. I personally followed this protocol for both SIBO and histamine intolerance with success. Do not hurry. I took nine months at this dose before very gradually increasing.
And some of you have asked me what to eat with sauerkraut! 🙂 Here are 10+ Ways to Use Sauerkraut.

How about growing your own veggies to ferment?
This great money-saver is so rewarding! But if you haven’t gardened much before, it can be intimidating. A great solution? Permaculture! Learn in this post about Lazy Gardening 😉 — how to grow your own food with the least amount of effort and in an environmentally friendly way! And then … ferment your homegrown veggies!

thefoodhunter says
This is a great post. I’ve always wanted to try it and may do so now.
Megan Stevens says
I’m so glad. It is so rewarding.
Tom says
I’ve been making kraut for 30+ years. Our recipe is cut cabbage with kraut cutter. Pack very hard in qt jars put 2tsp salt and 1tsp sugar on top of each qt. Boil water and let it cool to room temp. Pour water over, put lids on put on newspaper in a cool dark place. 4 to 6 weeks it ready. I also add hot peppers to some.
Megan says
Very concise, thanks, Tom!
Renee Kohley says
Such a great simple tutorial – it is so simple! My kids LOVE ferments and I do too!
Megan Stevens says
Yes!
linda spiker says
I still have not fermented my own veggies. I buy them. Of course you make it look so easy!
Megan Stevens says
You would enjoy the process and it is easy. Any mess-ups make the next batch better. 🙂
Tash says
I have always had the worst luck making anything fermented 🙁 I’ll have to give this at least one more try because I LOVE eating all fermented foods and they are so expensive at the store. Wish me luck! 🙂
Megan Stevens says
Good luck! I know: it’s crazy the cost of bulk cabbage/carrots and sea salt vs. the cost of paying for someone’s labor. Plus it’s a fun process. Key is to keep those veggies anaerobic and not too much space between the liquid and the lid either.
Andrea Kessel Fabry says
This is an excellent tutorial, Megan. I was so daunted when I tried making my first sauerkraut. It truly will be obvious if you shouldn’t eat it. I throw in some kelp or wakame to add an extra boost. Thanks for the post!
Megan Stevens says
Lovely! Thank you for sharing your suggestions Andrea! Those extra add-ins are so much fun to play with: extra nutrition and creativity!
Emily @ Recipes to Nourish says
I would really love to start making my own ferments. I love that you don’t use whey. Thank you so much for sharing these helpful tips with us!
Megan Stevens says
You’re welcome! Have fun!
Sue says
Great post! Can you answer this question though (sounds ridiculous) but how do you eat fermented foods? Do you just add some to your daily lunch salad, as a side with a Whole Food Plant Based diet? What’s your favorite way to eat fermented foods? Thank you!
Megan says
Hi Sue, yes, happy to and glad you asked. I’m sure the question and answer are helpful to others too. 🙂 We usually use it as a side or on top of salad. As a side, it’s kind of like eating a pickle-just a yummy, salty nibble amidst other flavors and textures. I usually have a few different ferments in the fridge, so I can use one that fits the meal or offer all of them. Sauerkraut-like ferments (ferments chopped small) can be mixed into tuna and chicken salads. We try to eat fermented foods at least once a day, but preferably with each meal, as they aid digestion in multiple ways. The serving size for a gut that tolerates ferments well is 1 tablespoon to 1/4 cup. You can imagine how delightful fermented foods are with a mezza type meal, which so many cultures enjoy, lots of bowls and dishes and passing and flavors and textures and nutrition and interest and conversation or thoughts about the food. The ferments add so much joy. 🙂
Raia Todd says
Thank you so much for the reminder that I need to make some sauerkraut! Haha. I usually just make it plain jane, but my kids love the carrot version, too. 🙂
Kelly says
This is so great. I’ve only made sauerkraut so am anxious to try some other veggies you have here.
Amy Sheree says
I LOVE anything fermented!! I have never done it myself, but now I want to!
Anne Lawton says
I make my sauerkraut, but have not tried any other vegetables. I’m going to give this a try once my garden is full of fresh veggies and we can’t eat them fast enough!
paleoglutenfreeguy says
Wow, you really give the full picture to answer any and all questions. I really appreciate it. I’ve always found making my own fermented veggies difficult but this guide will be super helpful.
Jenni LeBaron says
This is such a good run-down for people who have never fermented (me!). I’ve always wanted to try making my own sauerkraut and now I just might!
Annemarie says
This is such a great resource! I have an overabundance of veggies from my farm share, and I want to ferment some of them.
STACEY CRAWFORD says
Thank you for the detailed instructions! I have not done this & I really want to try this. You gave me just what I need to get started.
Kari - Get Inspired Everyday! says
I’ve never fermented my own veggies before but I love that you’ve so helpfully broken it down!
chihyu says
This is amazing! I’m going to try the asparagus one. I’ve never had fermented asparagus and I bet it’s delicious!
Megan says
Yes, yes, so true! Enjoy ChihYu!! Fermented asparagus is the best for sure!
jennifer says
Wow, I had no idea how to any of this . . thanks for sharing, you’ve inspired me!
Laura Duffy says
What a fantastic post! So much great information here that is helpful to both fermentation experts and novices. I can’t wait to try your recipes!
Elspeth Campbell says
I’m a newbie to fermenting vegetables and I need a little more detail… The instructions go from 1) pack the veggies into the jar, to 2) pour over the brine.
How is the brine prepared? Cold? Boiled?
Megan says
Hi Elspeth, I’m sorry; I can’t believe I didn’t spell it out better myself! I’ll add in clarification, and thank you for letting me know. To mix the brine, stir together (in a large mason jar, a 4-cup measuring dish with pour spout or whatever’s convenient) filtered room temperature water with salt, to dissolve. Then, pour it over the packed in veggies.
Joni Gomes says
I’ve been fermenting veggies for a while now but have always had trouble with sauerkraut (it exploded on me a couple of times). Thanks so much for this detailed post!!
Megan says
Oh no! Thanks for sharing Joni. You probably know already, but you can screw your lids on loosely, or use a top that helps with the exchange of oxygen and carbon dioxide (like this: https://amzn.to/2WhdpES). The lids help to release any built-up pressure! 🙂 Good luck on your next try. I hope you have fun and success.
Jean says
Love this post! I haven’t fermented anything is a long time but this post reminds me that I need to. Thanks for a great tutorial!
Jana says
We always have something fermenting in our kitchen — that Korean fermentation chamber you linked is the BEST.
Jacqueline says
Hi there
Can you use various peppers with these.
Thank you so much
Megan says
Great question, and I’m sorry for the delayed response. Actually, peppers do not ferment well for my taste. Jalapenos are fine, but bell peppers get mushy. I haven’t tried small peppers like banana peppers.
Julie says
This is an excellent post! Very informative. I am saving it via Pinterest. Saving your post to link back to!
Megan says
Great, Julie, thank you and best!
Lisa says
Hi there! I am really excited to try this……my only question is once they are ready and I need to store them in jars, do I add vinegar to the jars?
Megan says
Hi Lisa, no, no vinegar in these. The salt brine functions similarly and, with its probiotics, preserves the veggies. 🙂
Sandy says
Hi there, I have a special needs dog with food intolerance issues and I’m wanting to try giving her fermented vegetable. I want to try only green beans first. Is it ok to have only one vegetable with salt? It can’t have anything like garlic or another vegetable included because I have to try one vegetable at a time to be sure she can tolerate it.
Thanks
Sandy
Megan says
Hi Sandy, yes, that will work great. Best wishes with your pup!
Sandy says
Hi again, another question please. I see pint jars in your picture but no directions for that size jar. Can you ferment in pint size jars and if so what is the minimum amount of salt I should use? Please tell me also minimum amount in quarts.
Thanks
Sandy
Megan says
Hi Sandy, you make the same brine solution, the same ratio of water to salt, no matter what size jar you preserve in. I mix up the same amount of salt water brine solution no matter what size my jars are. I then pack the jars with veggies, in various size jars, and fill them all with the brine. I do not make the brine solution for one tiny jar at a time. But, if you want to half the recipe provided, you could use 2 cups water to 1 Tablespoon sea salt. Or to half that recipe, you could use 1 cup water to 1.5 teaspoons sea salt. 🙂
Sandy says
Hi,
I have processed a pint of green beans in salt water according to your directions and it’s been about 2 weeks. I’ve been tasting them along now and they are still pretty firm. How long usually does it take for them to get softer and how long can you leave them out of the refrigerator?
Thanks, Sandy
Megan says
Hi Sandy, green beans can take different amounts of time based on growing and how thick the skins were when the fermentation began. Theoretically, fermented veggies can stay at room temperature indefinitely and never need to be refrigerated, which is how and why fermentation first developed. Sometimes a ferment will go south, but oftentimes, and ideally, it doesn’t. That being said, you can certainly wait another week if they’re still too firm. I have kept ferments at room temp even longer. If you wish, at that point, you can transfer the ferment to the warmest part of your fridge, and allow the ferment to slow down but still continue, for up to another 3 weeks, or longer. This is common practice, as the flavors continue to develop and the veggie gets more tender. I can’t say with your specific green beans how soft they’ll get, though. So just keep tasting them every week or so, careful to have clean hands etc when you do. Hopefully you’ll find a time when they’re just right for you. 🙂
Sandy says
Hopefully this will be my last question and thanks so much for all the helpful quick replies. The water in my greenbeans is now cloudy and looks like it has stuff floating around in it thats white. Is this normal?
Megan says
Hi Sandy, no problem. It depends: Cloudy is VERY normal. But a white film on the very top of your ferment is not; that’s Kahm yeast. So hopefully you have the former. Kahm yeast is harmless, but it tastes “off”. You can taste to see or look to see if it’s generally cloudy or specifically a film on the surface.
Sandy says
There’s no film on the surface, it’s floating around in the brine. Do you know if that’s what you said? I tasted it and it don’t taste like it’s bad. I did put it in refrigerator. Do I leave the special lid on it in the frig or do I use a regular lid?
Thanks again!
Megan says
Sandy, sounds like you have a great ferment! When slowing down the process in the fridge, it’s fine to switch to a normal lid. So happy for you, sounds great! Now just give it a few more weeks minimum in the fridge, to keep softening the beans.
Diana Saenger says
Can you ferment vegetables with less salt? My husband needs a lower sodium diet. Thanks
Megan says
Hi Diana, yes, then you will use whey to inoculate it, so it begins its ferment faster. You can also use potassium salt if you like: https://eatbeautiful.net/homemade-lite-salt-salt-substitute-recipe-morton-copycat-salt-potassium/ 🙂