I may receive a commission if you purchase through links in this post. I am not a doctor; please consult your practitioner before changing your supplement or healthcare regimen.
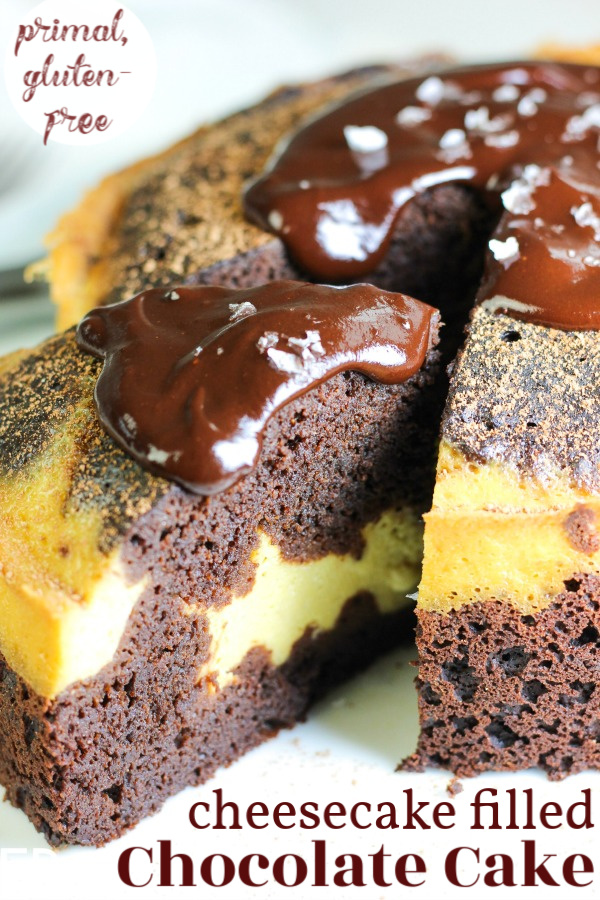
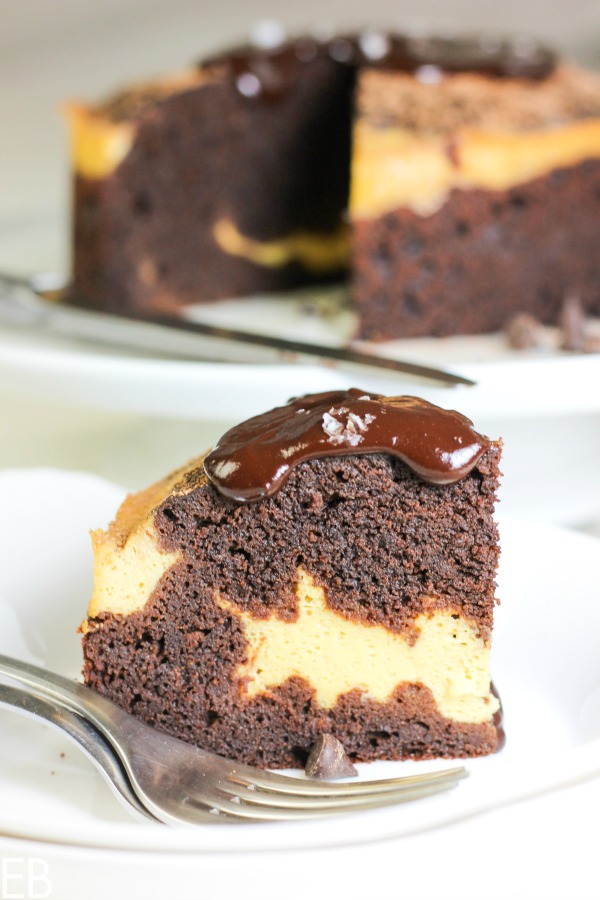
Baking a cake can be so complicated! With frostings and layers and wanting it to be pretty and hoping it will be moist … This Cheesecake-Filled Chocolate Cake solves those problems because 1) It is moist! 2) The layers are built right in! and 3) When it’s done, all we do is a little cocoa dusting or Easy Chocolate Ganache; and it’s so pretty! And so delicious!
The filling is FAST. The cake is LOVELY. The overall eye-appeal is alluring. It’s just so exciting to see a cream cheese filling inside a cake, yes?! And last, but quite exciting, this cake can also be made in your Instant Pot: oven -OR- IP, your choice!
Cheesecake Filled Chocolate Cake is Primal, Grain-free and Gluten-free.
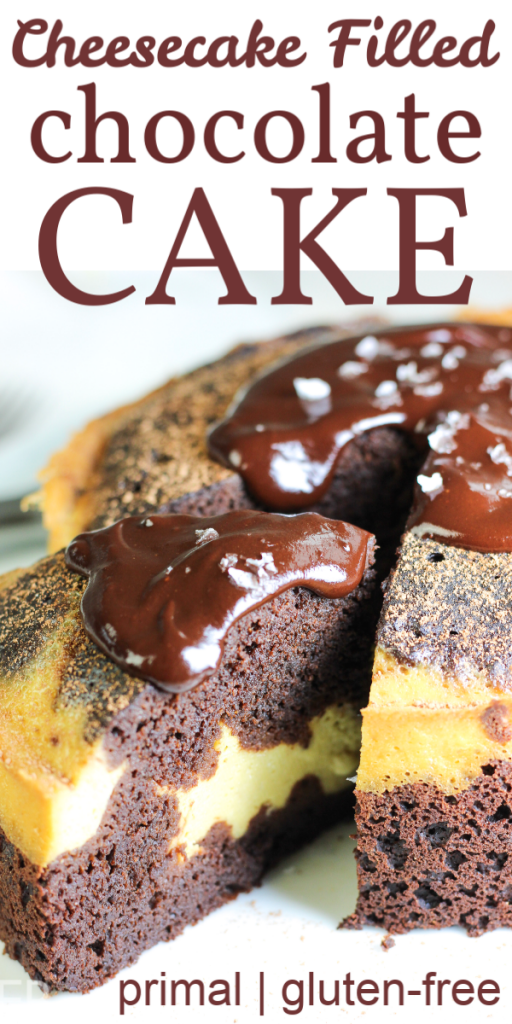
Which cream cheese in Cheesecake-Filled Chocolate Cake
This Cheesecake-Filled Chocolate Cake recipe can use 1) the lactose-free cream cheese I mention in the paragraph below or 2) chevre! (I buy a French one at Trader Joe’s) or 3) any normal cream cheese you like!
“Allergy” info on cream cheese:
In regard to cream cheese, I like to give options for those who might be sensitive to dairy but still love their cheese!
Have you ever found lactose-free cream cheese at the market? I first spotted it at Natural Grocers, here in Eugene, OR. It’s wonderful! Many eaters who can’t tolerate cheese unless it’s aged (like those patients on the GAPS Diet) can enjoy this cheese. It’s sustainably made and tastes lovely (creamy)! It’s gentler on one’s digestion and suitable for more diets. The one we find at Natural Grocers also contains live and active cultures, so it has probiotics when eaten cold (not baked).
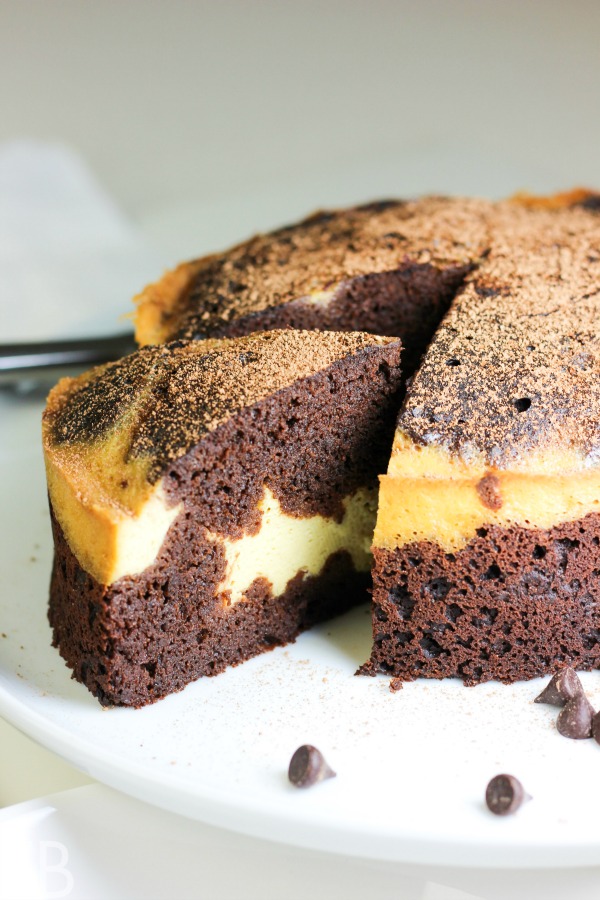
How to cook Cheesecake-Filled Chocolate Cake
OVEN: Cheesecake-Filled Chocolate Cake can be baked in a variety of shapes, pans and quantities.
For example, I like making it in a smaller 7″ pan (here’s the pan I have, which is what you see the cake baked in that’s photographed above) and then using any leftover batter to make one to two black-bottom cupcakes! (Sometimes I have leftover batter with this recipe, and sometimes I don’t … must be the size of the eggs or other variables.)
I’ve also made (brownie-height) one 9″ round and one 5″ round cake with just one recipe of the batter. The overall appearance of the cake is a bit different when baked like this, because it’s not as deep, but SO pretty in a different way. I go into some detail on the possibilities below in Recipe Notes. They’ve all turned out beautifully, just adjusting the baking time for the variety of sizes.
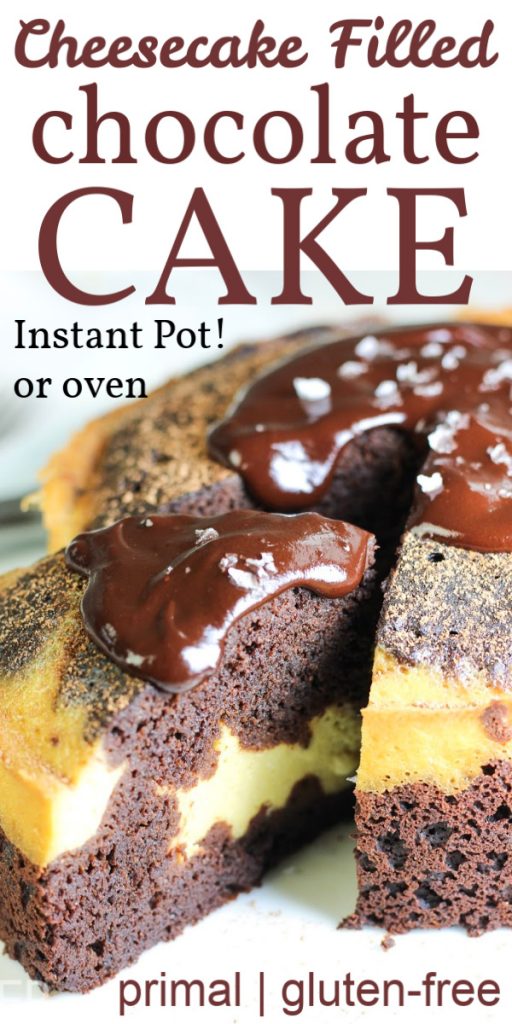
INSTANT POT: As mentioned above, Cheesecake-Filled Chocolate Cake can also be cooked in your IP! It’s an exciting and fun process to make great cake in an Instant Pot. It never gets old for me, just fun.
I use my 7″ cheesecake pan (find it here), add two inches of water to the IP (here’s mine) and the trivet, and the cake cooks for 35 minutes. It comes right out of the pan, gets topped with a cocoa dusting or chocolate ganache and my favorite sea salt (find it here) and … time to dive in! I give all the IP instructions below in the recipe.
Instant Pot gadgets
Here’s the Instant Pot Sling that makes lifting out the cake that much easier.
Here’s my other favorite Instant Pot accessory, The Steam Boss, which saves our new cabinets every time I do a quick-release, because it routes the steam away from them in the direction I choose. (I gave both of these accessories for Christmas presents this year to multiple folks because I so appreciate having them myself.)
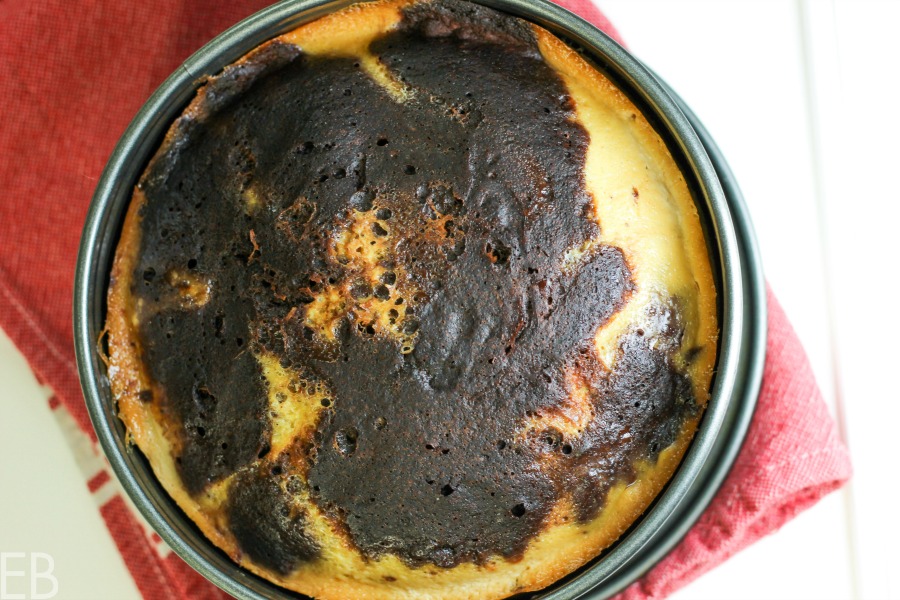
When to make Cheesecake-Filled Chocolate Cake
Perhaps you’ll make Cheesecake-Filled Chocolate Cake for a special holiday? … or … I’ve already made it twice this week, 😉 because we even love eating it for breakfast, and it’s super fast to make. Special occasion or everyday, this cake will make you happy. 🙂
I love chocolate. I love fillings. I love cream cheese filling. This cake is great. Have at it!
Love and cake! (And smooches.)
Cheesecake Filled Chocolate Cake
Equipment
- oven OR Instant Pot
- baking pan OR cheesecake pan
Ingredients
Chocolate Cake
- ¾ cup cocoa powder or substitute up to ¼ cup cocoa with roasted carob powder
- ½ cup cassava flour Otto's brand, (see link below)
- ½ cup butter , ghee, or coconut oil, melted then measured
- ⅓ cup warm water
- 3 eggs , room temperature
- ½ cup maple syrup , honey or coconut sugar
- 2 teaspoons vanilla extract
- ½ teaspoon baking soda , sifted
- ½ teaspoon sea salt
- cocoa for dusting
Cream Cheese Filling
- 8 ounces cream cheese , room temperature (or chevre)
- 1 egg , room temperature
- ¼ cup maple syrup
- 1 teaspoon vanilla extract
- pinch sea salt
Instructions
- Preheat oven to 325 degrees Fahrenheit for oven version of this recipe. Grease a 7-inch leak-proof cheesecake pan (for Instant Pot version) or 9-inch leak-proof cheesecake pan if preferred for oven version (see links below) or use any shape pan your prefer for the oven (a 9" by 13" casserole dish, a traditional 9" round cake pan lined with parchment etc.); but a leak-proof cheesecake pan is best for presentation. (If you use the 7-inch, you'll have batter left over, with which I make 2-3 black bottom cupcakes!)
- Make Cream Cheese Filling (recipe instructions below).
- In a medium sized bowl, sift together the dry ingredients: cocoa powder, cassava flour, baking soda and sea salt. Set aside.
- In a large bowl, using a hand mixer, blend together the wet ingredients. Alternatively, combine them in a blender or briskly by hand.
- Add the dry ingredients to the wet ingredients and fold together with a rubber spatula until completely combined. Do not over-mix. Pour into the greased pan.
- Using ⅔ of the mixture, ladle large dollops of the cheese filling (recipe instructions below) around the surface of the cake. Use a spoon to push down 1-2 inches on each dollop, so the filling goes into the center of the chocolate batter. Use a spatula to scrape the remaining cheese batter over the surface of the cake; and spread it out evenly, not all the way to the edges, leaving about ½ an inch of chocolate batter showing around the circumference of the pan.
Cream Cheese Filling
- Place all filling ingredients into blender or medium sized mixing bowl. Blend on low speed, or use hand beaters to combine until thoroughly mixed and creamy, about 25 seconds. Set aside until above recipe calls for filling.
Chocolate Cake (Oven Instructions) — See Instant Pot Instructions below.
- Bake for about 45 minutes in preheated oven until the edges are puffed and the center is slightly puffed and golden and beginning to look dried out on the top with very little jiggle if you shake the pan side to side. Cooking times will vary slightly based on the size of the pan and the depth of the cake; check cake(s) after 25 minutes if you're using the batter divided between two pans (see Recipes Notes for this idea).
- Allow to cool. Using a wooden knife, unclasp the outer ring of the pan and slide the knife around its circumference. Remove pan's sides. Use wooden knife again, if needed, to release the base of the cake from the pan base. Transfer cake to serving plate. Sift remaining cocoa over its surface until cream cheese is completely or partially covered, whatever looks prettiest to you. Refrigerate until ready to serve.
Instant Pot Instructions
- Place trivet/steam rack in the bottom of the Instant Pot insert, and add 2 cups of water. Place covered cheesecake pan on the steam rack. (To cover cake: Cover the pan with tin foil over parchment paper; or use parchment paper and place a small salad plate over the paper [to keep it down and somewhat dry during cooking].)
- Make sure rubber ring is fitted inside lid, place lid on Instant Pot and seal steam vent. Manually set the time to 35 minutes on "high" pressure using “+” button. When timer goes off, allow 10 minutes of natural pressure release.
- Then cover steam vent with dish towel (and/or use Steam Boss accessory [link below in Recipe Notes]), quick release the remaining pressure and carefully remove pan from Instant Pot to cooling rack.
- Allow cake to fully cool, about 4 hours. Open springform pan while using wooden knife to loosen cake’s sides from pan, if necessary. It should actually come away from the sides really easily.
- Top with dusted cocoa powder or Chocolate Ganache. See Ganache link below in Recipe Notes.
Notes
Find the Chocolate Ganache recipe HERE.
7-inch and 9-inch Springform Cake Pans
- This is the cheesecake pan I have. Unfortunately all cheesecake pans these days are non-stick. That's why I use a wooden knife with it, to protect the coating. I like this pan because it's leak-proof! That means I can pour liquid cake batter into it! Also, I purposefully got this size because it fits into my Instant Pot! So you can make cakes and cheesecake in your IP, which works great and is very easy-- and thus super exciting and rewarding! Only downside to this size is that all the batter will not fit. Yet I like this tall, smaller, charming cake (and that this pan fits in my IP) so I make 2 black bottom cupcakes with the leftovers, that I can put in school lunches or send with my hubby to work or eat myself for breakfast!
- Here's the 9-inch leak-proof cheesecake pan, which will actually fit all the batter from this recipe, if you prefer (which many will) to get 10-12 servings from one cake.
- Lastly, here's a great, basic cake pan. This option works well if you simply press parchment paper down into the pan, flattening all the wrinkles along the sides and cutting off any portions that stick up too high around the edges. When the cake is done, you just gently pull up on the parchment sides, set the cake down and then slide it onto a serving plate. The edges of the cake will show slight crimps from the paper, which actually looks just slightly rustic and quite lovely. I like this option because even if a batter touches the pan aluminum in safe for baking (just no acidic ingredients in the batter like lemon or tomato); there's no non-stick coating, and it conducts heat well. It's what commercial kitchens use for their cakes; and the pans last forever.
- Final exhaustive note on sizes, you can fill the batter as high or as low you want; so you can even make two cakes with this recipe. Yesterday I made this recipe again, and I made one 9" cake that was almost 2" tall when it was done and so pretty, and one 5" cake about the same height for a separate occasion. The first cake made 8 nice wedges. The second could be cut into 4 chunky wedges or 6 charming pieces for small, lovely portions. In short, this recipe is versatile and inspires one to serve it in many ways, all pretty and fun.
Here's the cassava flour I use and love.
Find the Steam Boss HERE.
Nutrition
Intrigued by Instant Pot cakes? You’ll also love this grain-free Instant Pot Sticky Toffee Pudding, so moist and topped with caramel.
Love cheesecakes? Me too! Here are a few of my favorites:

Renee Kohley says
Oh GOODNESS! I am going to try to talk someone in this house to want this for their birthday! I need to order a cheesecake pan!
Megan Stevens says
Lol, I like how you’re strategizing!
Carol @studiobotanica says
I have all the ingredients and your step-by-step instructions will make this possible!
Looks and sounds so delicious!
Megan Stevens says
Great, Carol!
Emily @ Recipes to Nourish says
I love this so much!!! This cake is EVERYTHING. So beautiful, dreamy and cozy. I need to make it soon.
Megan Stevens says
Yay!! Thank you! 🙂 Enjoy!
Raia Torn says
I think I might have juuuust enough cassava flour to make this. No springform pan though, so I just might have to eat it out of my cake pan with a fork. 🙂
Megan Stevens says
🙂 That’ll work! It can even be made in a 9″by13″ casserole dish and cut into brownies type squares!
Stacy says
I cannot wait to make this! It looks amazing.
Megan Stevens says
Wonderful, enjoy!
linda spiker says
Very alluring! Such yummy chocolate-y goodness!
Megan Stevens says
Thanks, Linda!
Kelsey Steffen says
Totally drooling over here! Chocolate and cream cheese are pretty much my favorite combination…this cake hits it out of the park! YUM!
Megan Stevens says
Ha, thanks! 😉 So glad!
Anna @GreenTalk says
So drooling. So decadent.
Megan Stevens says
Thanks, Anna! 🙂
Suzanne Pals says
This is INCREDIBLE! I made it last night…it’s so moist and tastes like amazing chocolate cake with cheesecake in it. Fantastic!
Megan Stevens says
Yay!!! Great to hear! Thanks for the feedback! 🙂
yourtoastisburnt says
I can attest to this, I ate about 1/4 of her cake, haha
Megan says
Too funny! 😉 Thanks for sharing your feedback too! 🙂
Heather says
Can anyone tell me how to make this Wonder in my Instant Pot? I just got a double stack insert and would love to make this tomorrow for Valentine’s Day.
Megan Stevens says
Hi Heather, I’m going to update the recipe for that need! I’m glad you asked! 🙂 I am giving you an educated guess today, because I won’t have time to make this first in the IP (by tomorrow). But here’s what I think, based on other cakes and breads I’ve made in the IP. Once I’ve tried it myself, I’ll officially add the IP option to the recipe above. Feel free to let me know how it goes!!
Starting at step #6~
-Pour (and scoop the filling) the batter into the greased pan, following step #6 above, and cover with a heat-tolerant salad/dessert plate that fits the size of the pan and the IP.
-Add 1 cup of water to the Instant Pot and place the Instant Pot trivet inside the stainless steel pot.
-Set the pan inside the IP on top of the trivet.
-Put
the IP lid on and secure it in the locked position. Plug in the Instant Pot. Make sure the vent on top of the lid is in the
sealed/closed position. Press the MANUAL button. Then press the “+” sign to
increase the time to say 20.
-When
the IP is done and beeps, press
the “Keep Warm/Cancel” button and then unplug the Instant Pot. Allow the
Instant Pot to naturally release pressure for 20 minutes. Using an oven
mitt, turn the vent to “venting” to manually release any leftover
pressure, (the silver circle will drop when it’s safe to open). Carefully
remove the lid.
Using
an oven mitt, carefully remove the pan and place on a
cooling rack. Carefully remove the plate (it’s hot), not allowing any moisture to fall on the cake.
-Proceed from step #8 above.
Good luck & Enjoy!! 🙂
Heather says
Thank you so much!
Joni Gomes says
Ohhh man this is my kind of cake!! I’d like some for breakfast please!
Linda says
Is there a gluten free, nut free flour that can be used in place of the cassava flour?
Megan says
Hi Linda, you can try tiger nut flour (which isn’t a nut, but a tuber). It has a bit of nubbiness to it though, so the cake won’t be quite as smooth in texture; it’ll make it taste “healthier”. 🙂
Cheryl Malik says
I will definitely be making this soon!
Adrienne says
OK I HAVE to get an IP now. What a delish looking dessert!
STACEY CRAWFORD says
Wow, this looks so good! Love the cheese cake center!
Renee D Kohley says
Oh gosh this is so special Megan! I can’t wait to try this – and that amazing ganache on top! Yum!
Megan says
Thank you Renee! 🙂
whatggmaate says
Oh yum, these are SO dreaming looking!
Tessa Simpson says
MUST make this!! Simple ingredients, and what a combo!!
Kathryn W says
What an awesome treat! And, I love that you can make it in the Instant Pot! I’m going to have to check out your other Instant Pot cake recipes!
CHIHYU says
I love this – chocolate with cheese cake combo. Just delicious!
Linda Kurniadi says
I wish my birthday is coming up really soon so I can have this cheesecake! Love this chocolate filling too
Hope says
What a gorgeous looking cake! Drooling! Love how you have given an option for the instant pot too!
annelawton says
This cheeseckae looks amazing! I thanks for the instant pot version, I haven’t tried desserts in mine yet!
Kari says
Oh wow, this looks incredibly decadent and it’s the perfect combination of my 2 favorites!
meredith says
Chocolate cake filled with cheesecake!?! Sign me up! This will have to be the first cake I have made in my Instant Pot!
Catherine Baez Sholl says
Looks delicious! You can’t go wrong with chocolate and cheesecake. Yum!
Kathy says
What is maple syrup honey?
Megan says
Ha, thanks Kathy. That’s just the way my recipe card printed the information. I added an “or” to clarify: whichever unrefined sweetener you prefer.
Kathy says
Thanks so much! I thought it was a typo but wanted to make sure I wasn’t missing something! 🙂
Katie Beck says
I LOVE the cheesecake up the middle! This looks wonderful and I will def be trying this out 🙂
Deborah says
I made this yesterday as a trial run for Valentine’s Day. It was WONDERFUL! So moist and yummy chocolate with cheesecake! Heaven! Thank you for this recipe. A dessert with benefits I think! I used Lakanto maple syrup to cut down on the sugar.
Megan says
Hi Deborah, So glad you love the cake!, and thank you for sharing your feedback!! 🙂 Great to know about your lower sugar variation too. Blessings!
Deborah says
I made this again for Valentine’s Day. I was out of Lakanto maple syrup and subsitututed Lakanto Classic granulated sugar. It still tasted wonderful, however it was a little dry. Should I have increased the water since I was using granulated sugar? Also, by how much? Thank you, Megan.
Megan says
Hi Deborah, I would just go back to the original recipe and make the cake with maple syrup again. I haven’t trialed the recipe with granulated sugar and water. You could make a simple syrup by first dissolving the sugar in the water, but I haven’t tried that, so I can’t be sure it would work. Thanks!