
DIY Charcoal Packets for Making Veggies & Fruit Last Longer in Fridge (or at room temp)
DIY Charcoal Packets for Making Veggies & Fruit Last Longer in Fridge shares a basic scientific principle -- that natural chemicals cause spoilage -- and solves that problem: because activated charcoal adsorbs this chemical! I'll show you how to make these simple packets -- much lower in cost than the ones you can buy -- and better quality! Whether you have a big yield from your garden, a trip you're going on (despite having fresh produce in the fridge) or you just want your produce to last longer, this solution is a great approach to extending the life of veggies and fruits.
Servings 1 sachet
Cost $1.50
Equipment
- small scoop or measuring spoon
- plate or paper napkin
Ingredients
- 3 cheesecloth baggies/sachets <-- See product link. This product allows you to make up to 8 sachets.
- 2/3 cup activated hardwood charcoal <-- Choose this product, or be sure your charcoal is hardwood derived.
Instructions
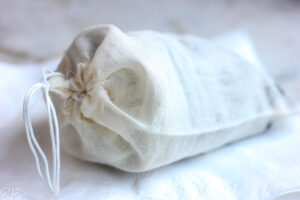
- Place three cheesecloth baggies one inside the other, so the sachet is 3 baggies-thick. You may find this easiest by folding each one in half lengthwise and slipping it into the next bag, and then unfolding it. Repeat until all three bags are fit inside each other.
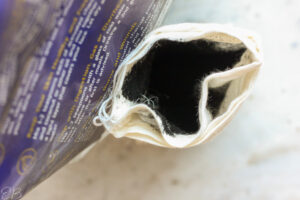
- When first opening the bulk bag of charcoal, be aware that some may spill out. You can wear latex gloves, or just know that some of the fine powder will get on your fingers and under your nails and be a little hard to wash off. Charcoal can also stain clothing.Clear a work space so if spills happen, it won't be a problem. You may wish to place the 3-fold sachet onto a paper napkin or plate. Very fine charcoal sediment will likely come through the bag as you prepare it, but only the tiniest amount.
- Use a small scoop, measuring cup or tablespoon to carefully transfer charcoal into innermost bag.
- Tie the innermost bag first, then tuck it down a bit.

- Next, tie the second bag, sealing it up.
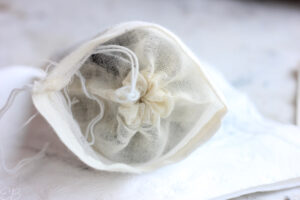
- And finally, tie the outermost bag.
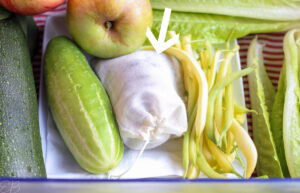
- Place sachet in the produce drawer of your fridge, on the counter with your bananas, in cold storage with apples, next to winter squash, in your fruit bowl, or wherever you want to extend the shelf life of your produce.
- Repeat the process, and make multiple bags, if you'd like to use them around the house for various needs. (These sachets also reduce odors.)
- If you find they work less well over time: Set them in the hot sun for two hours to refresh the porousness of the charcoal. If there's no hot sun, store them away until summer (after dehydrating; see note below), make new bags, and then refresh any older ones when the weather improves. OR, I use my sun lamp (find the Fiji model here) for this purpose, or you could even use a tanning bed or reptile lamp.If your Charcoal Packet gets damp or wet: Place the entire packet into your dehydrator until it dries out again, about 2 hours on the highest setting, depending on your dehydrator. Some machines may require longer. Or in the summer, place out in the hot sun to dry out.If you don't have a dehydrator, and there's no hot sun, use your oven on its lowest heat, with the door propped open, or place packet in warm oven after use (when it's off), with the door propped open. Some people use a wooden spoon handle so the oven door is open just enough to allow circulation, without cooling the oven down too much.